A nursery of kale, cabbage, tomato or onion seedlings is the most valuable square metre on a vegetable farm. Every plant that leaves it will fill a planting station in the field, and every plant lost there is a gap you pay for twice: once in seed and once in a field that was prepared and never filled. Watering that nursery by can, as in the photograph above, works, but it is slow, uneven, and it hammers small seedlings with heavy drops from a height.
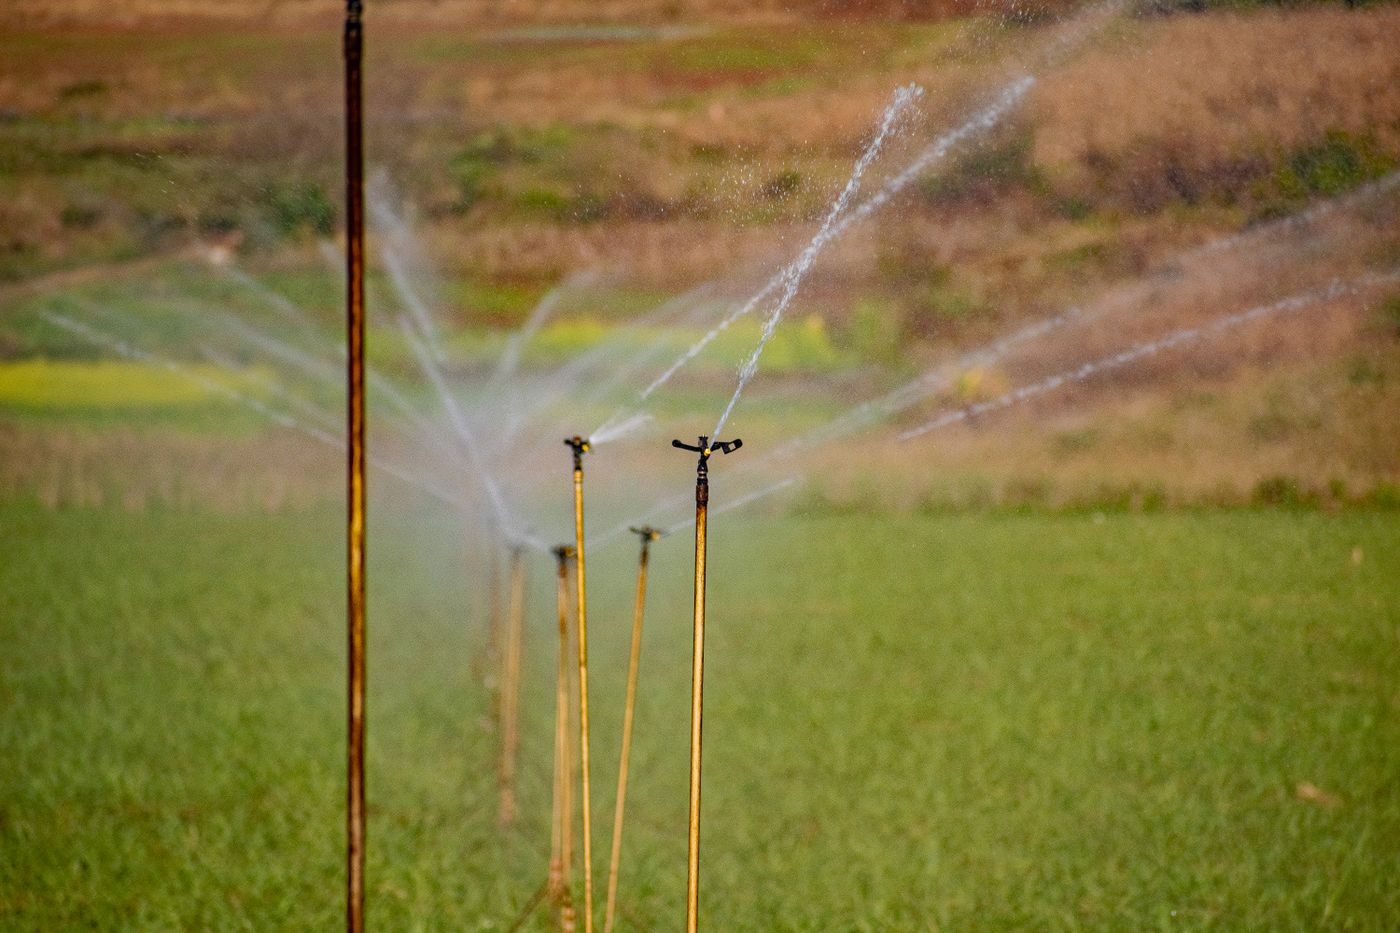
Ground micro sprinklers are the step up. They are small, cheap, low-pressure sprinklers that sit on a stake or a short riser and throw a fine spray over a circle a few metres across. Laid out properly, a handful of them waters a nursery or a block of leafy vegetable beds evenly in minutes. Laid out badly, they leave dry patches, flood other patches, keep leaves wet all evening and feed exactly the fungal diseases that kill seedlings in the rains.
This guide covers the layout, spacing and overlap that give even watering, the pressure micro sprinklers need and where it comes from, how to work out your application rate so you do not drown a seedbed, the watering times that limit disease in wet weather, and the filters and habits that stop the nozzles clogging. For the broader decision between drip and sprinklers across a whole farm, see our guide to drip irrigation versus sprinklers; this article stays with the nursery and the leafy vegetable bed.
Why Micro Sprinklers Suit Nurseries and Leafy Beds
Drip irrigation puts water at the base of each plant, which is ideal for a tomato field planted at wide spacing. A nursery is different. Seedlings in trays or a broadcast seedbed stand a few centimetres apart, hundreds to the square metre, and every one of them needs water. There is no row of plants to lay a drip line along. Leafy vegetables such as spinach, managu and amaranth planted close in a bed are similar: the whole surface of the bed needs wetting, not a line of points.
A micro sprinkler wets the whole area, and the fine droplets it produces land gently. A watering can or a hose held by hand delivers big drops from a height that can splash soil onto leaves, wash seed out of its cell and knock young seedlings flat. Fine spray avoids that, and because the sprinklers are fixed, the watering is the same every day regardless of who does it. For more on raising transplants themselves, see our guide to seedling nursery trays and transplanting.
Layout, Spacing and Overlap: Getting Even Water
The single most important fact about any sprinkler is that it does not water its circle evenly. Most of the water falls in the inner part of the circle, and the amount tapers off towards the edge of the throw. If you space sprinklers so their circles just touch, the edges between them get far less water than the middle, and you will see it within a week as patches of slower, paler seedlings.
The fix is overlap. The standard approach, called head-to-head spacing, places each sprinkler so its spray reaches the next sprinkler. In other words, the distance between sprinklers equals the wetted radius, not the diameter. Every point in the bed then receives water from two or more sprinklers, and the thin edges of each circle are topped up by its neighbours. It needs more sprinklers than spacing at the full diameter, but micro sprinklers are cheap and seedlings are not.
Two practical points follow. First, measure the wetted radius yourself at your own pressure; set one sprinkler running, walk out until the spray stops reaching the ground in useful amounts, and use that distance. The radius printed on a pack assumes a particular pressure, and yours may be lower. Second, lay the sprinklers in a square or triangular grid, not in a single line down the middle of a long bed. A single line leaves the edges of the bed under-watered unless the bed is narrow enough to sit well within one radius.
Wind matters even with small sprinklers. A breeze carries fine droplets sideways and distorts the circle, so on an exposed site close the spacing up a little, water in the calm hours of early morning, and use the shade net or a windbreak around the nursery to shelter the spray.
Pressure: What Micro Sprinklers Need and Where It Comes From
Micro sprinklers are designed for low pressure, but low is not zero. Many work in a band of roughly one to two bar; check the figure for the model you buy. Below its working pressure, a sprinkler dribbles instead of spraying, its radius shrinks, and the water piles up near the stake. Above it, the spray turns to mist that drifts away on the slightest wind.
It helps to know where pressure comes from. One bar is about ten metres of water column. A tank on a three-metre stand gives roughly 0.3 bar at ground level before any friction, which is not enough to run most micro sprinklers properly. That is why a raised tank alone often gives disappointing results, and why most nursery systems use a small pump or booster to supply the line. Our guide to tank stands and gravity flow works through the arithmetic, and the one on booster pumps covers the pump side.
Pressure also falls along the line. Every metre of pipe and every fitting takes some, and a long line of sprinklers on a thin hose can leave the far end starved while the first heads spray well. Feed long beds from the middle rather than from one end, keep the lateral short, and use a larger supply pipe to the bed. Where the source pressure is high or variable, a pressure regulator at the head of the nursery line holds the sprinklers in their working band.
Application Rate: How Fast You Are Really Watering
The figure that ties layout and pressure together is the application rate: how many millimetres of water land on the bed each hour. It is the flow from one sprinkler divided by the area each sprinkler serves. One litre spread over one square metre is one millimetre deep, which makes the arithmetic easy.
Take a worked example with stated assumptions. Suppose each sprinkler delivers 40 litres an hour at your pressure, a figure you can measure by timing how long it takes to fill a bucket. On a square grid at two metres spacing, each sprinkler serves four square metres, so the application rate is 40 divided by 4, which is 10 millimetres an hour. Run the system for 30 minutes and the bed receives about 5 millimetres.
Why this matters in a nursery: seedling trays and a fine seedbed hold little water, and a fast application can run off the surface or wash out seed before the medium soaks it up. Several short runs give the medium time to absorb water between them. The right amount is whatever brings the medium to moist but not waterlogged, and the only reliable test is your finger in the tray or the bed, checked at the same time each day.
Timing in the Rains: Keeping Leaves Dry Long Enough
The diseases that ruin nurseries in wet weather share a need: free water on the leaf or a constantly wet surface. Damping-off, caused by soil-borne fungi and water moulds, kills seedlings at the stem where it meets the medium, and it thrives in a medium that never dries at the surface. Leaf diseases need the leaf to stay wet for hours. Overhead watering adds to that wetness, so the timing of each run is as important as the amount.
Water early in the morning. Leaves wetted at sunrise dry within a few hours as the sun and air warm up. Leaves wetted in the late afternoon stay wet all night, adding hours of leaf wetness on top of the dew, which is the condition fungal diseases need. In the short rains, also water by need, not by habit. If it rained in the night and the trays are still moist, skip the run. A sprinkler on a timer that runs whatever the weather is one of the commonest ways to keep a nursery too wet.
Give the nursery air. Raise trays off the ground on a bench or blocks so air moves below them and water drains away, and avoid packing trays so tightly that the canopy never dries. Our guide to greenhouse irrigation covers ventilation and watering under cover, where the same principles apply with even less wind to help.
Filters and Clogging: Keeping Small Nozzles Open
Micro sprinkler nozzles are small, and a single grain of sand or a flake of algae can block one or distort its spray into a jet. A blocked or half-blocked head leaves a patch of the nursery dry while the system looks as though it is running. Clogging comes from four sources: sand and silt from the source, algae growing in an open tank or in clear pipe, scale from hard water, and insects that crawl into a dry nozzle between runs.
Put a screen filter on the line at the head of the nursery, after the pump and before the first sprinkler. For micro sprinklers, a screen of around 120 mesh is a common choice, but follow the sprinkler maker's figure. Clean it on a routine, not when the spray fails: open it, rinse the screen, and look at what it caught, because that tells you what your water carries. Our guide to drip filters explains screen and disc filters in more depth.
Cover tanks so light cannot reach the water; algae need light, and a covered tank grows far less. Use black or opaque pipe rather than clear hose for the same reason. Flush the end of each lateral at the start of the season and every few weeks after, letting water run until it comes out clean. Walk the nursery while the system runs once a week, looking at each spray pattern. A head spraying a narrow jet or a lopsided arc needs its nozzle cleared, and a soft brush or a fine wire usually does it without enlarging the hole.
| Item | Stock code | Price |
|---|---|---|
| GROUND MICRO SPRINKLER SET | 6489 | KSh 125 |
| SPRINKLER BUTT (FLOWER) | 6400 | KSh 100 |
| PLASTIC SPLINKLER BLUE | 6335 | KSh 150 |
| WATER FILTER | 6423 | KSh 2,000 |
| PRESSURE REGULATOR | 6350 | KSh 3,500 |
| ZEBRA HOSE PIPE 1/2*60FT | 6437 | KSh 600 |
| HOSE CLIPS | 6259 | KSh 200 |
| 0.5HP BOOSTER PUMP (YELLOW) | 6594 | KSh 3,000 |
Prices are from our current price list and can change, so confirm before you buy. Because the sprinklers themselves cost little, the filter and the pressure are where a nursery system succeeds or fails; budget for them first. We also put together irrigation kits for small plots, and you can see the wider range on our sprinklers page.
Setting Up a Nursery Line: A Simple Sequence
Mark out the nursery or bed and decide the sprinkler grid from the wetted radius you measured, with head-to-head spacing. Bring the supply pipe to the middle of the block, fit the filter and, if your source pressure varies, a regulator at that point. Run laterals out to each row of sprinklers and close the ends so they can be opened for flushing. Turn the water on and walk the block, checking every spray, then measure flow from one head with a bucket to work out your application rate and run time.
Finally, set the routine: water at sunrise, check the medium with your finger before each run in the rains, clean the filter weekly, and flush the laterals every few weeks. A nursery watered evenly, at the right time, through clean nozzles, sends out uniform seedlings, and uniform seedlings make a uniform field.
Key Takeaways
- Micro sprinklers suit nurseries and close-planted leafy beds because the whole surface needs water and fine droplets land gently on seedlings.
- Space sprinklers head to head, at one wetted radius apart, so every point catches spray from several heads; circles that only touch leave dry gaps.
- Most micro sprinklers need roughly one to two bar; a tank on an ordinary stand gives far less, so plan for a pump or booster.
- Application rate is flow per sprinkler divided by the area it serves; one litre on one square metre is one millimetre.
- Water at sunrise and skip runs after a wet night in the rains, because hours of wet leaf drive damping-off and leaf disease.
- Filter at the head of the line, cover tanks, use opaque pipe and flush laterals to stop small nozzles clogging.
Frequently Asked Questions
How far apart should micro sprinklers be in a nursery?
Space them head to head, which means the distance between sprinklers equals the wetted radius, so each spray reaches the next sprinkler. Measure the radius yourself at your own pressure, because the figure on the pack assumes a particular pressure. Lay them in a square or triangular grid rather than a single line, and close the spacing slightly on a windy site.
Can I run micro sprinklers from a raised water tank?
Usually not well on its own. One bar is about ten metres of water column, so a tank on a three-metre stand gives roughly 0.3 bar before friction, while many micro sprinklers work best at around one to two bar. At low pressure they dribble and the circles shrink. A small pump or booster, with a filter and a pressure regulator where needed, gives proper spray.
When is the best time to water seedlings with sprinklers?
Early morning. Leaves wetted at sunrise dry within a few hours as the day warms, while leaves wetted in the evening stay wet all night, adding to the dew and creating the long leaf wetness that fungal diseases need. In the rains, check the trays or bed with your finger before each run and skip watering when the medium is still moist.
Why do my micro sprinklers keep clogging?
The usual causes are sand and silt from the water source, algae growing in an open tank or clear pipe, scale from hard water, and insects nesting in nozzles between runs. Fit a screen filter at the head of the nursery line and clean it on a routine, cover the tank, use opaque pipe, and flush the end of each lateral every few weeks until the water runs clean.
How long should I run micro sprinklers on a nursery?
Work out the application rate first: flow per sprinkler in litres an hour, divided by the square metres each sprinkler serves, gives millimetres an hour. For example, 40 litres an hour at two metre spacing gives 10 millimetres an hour, so 30 minutes applies about 5 millimetres. Then adjust run time until the medium is moist but not waterlogged, using several short runs rather than one long one.