A packet of hybrid tomato seed is one of the most expensive things per gram that a Kenyan farmer buys. Scattered on an open seedbed, a good share of it never becomes a plant in the field: some rots, some is eaten, some germinates and then damps off, and a fair proportion of the survivors lose most of their roots when they are pulled out of the soil for transplanting.
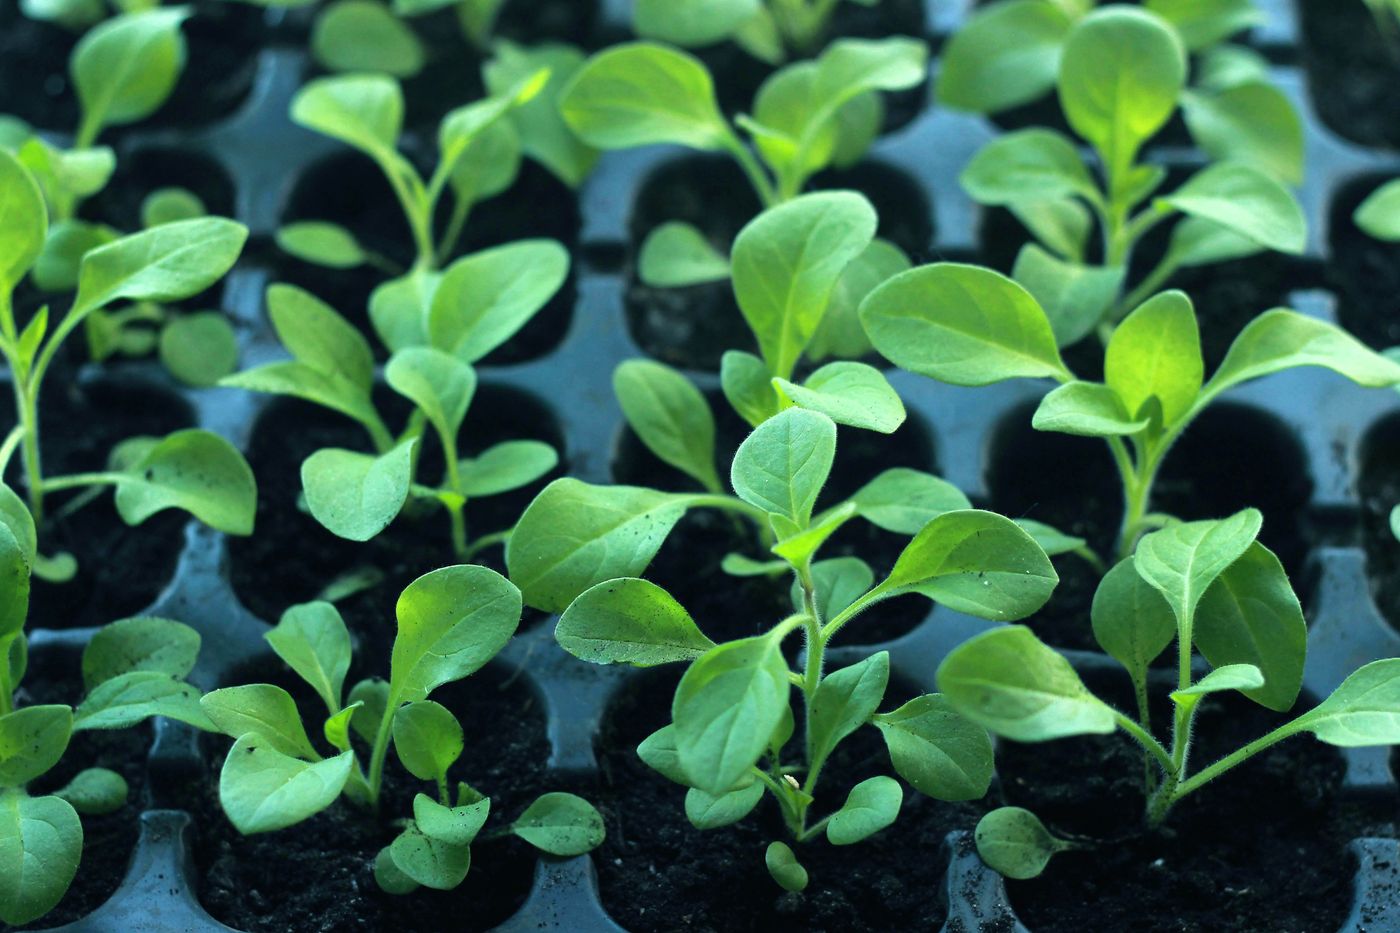
The same seed, sown one per cell in a tray of clean media, comes out as a plant with its entire root system intact inside a block of medium. It goes into the field without knowing it has moved. It carries on growing the same week instead of sulking for ten days.
That difference, the transplant shock you do not pay for, is why nursery trays have spread from commercial horticulture to smallholder plots across the country. This guide covers the whole cycle: choosing cell size, mixing media, sowing correctly, beating damping off, keeping virus-carrying insects out, hardening off, and getting seedlings into the ground so they never check.
Why a Tray Beats an Open Seedbed
A traditional seedbed grows seedlings in field soil, and it inherits everything in that soil: nematodes, fungal pathogens, weed seed, and whatever disease the previous crop left behind. It also grows roots into a shared mass. When you lift a seedling from a seedbed, you tear that shared mass apart, and the fine feeder roots that actually absorb water and nutrients are the first thing lost.
A tray gives every seedling its own cell. The roots fill the cell and form a plug held together by the medium. Lifting is a matter of pushing the plug out from below, and the plant arrives in the field with the same roots it had five minutes earlier. Establishment is faster and far more uniform, and a uniform field is easier to spray, feed and harvest in one pass.
The other advantages are practical. The nursery occupies a few square metres you can actually watch and protect, so pests and disease are caught early. You can raise the next crop's seedlings while the current crop is still finishing in the field, which shortens the whole rotation. And one seed per cell means you buy the seed you plant rather than the seed you hope survives.
Choosing Cell Size: Bigger Cells, Stronger Plants, Fewer per Tray
Nursery trays are sold by cell count, commonly in the range of about 50 cells at the large end to 200 or more at the small end, moulded from black plastic or polystyrene. The trade-off is direct: more cells per tray means less medium per plant, a smaller root ball, and a seedling that must be transplanted sooner and handled more gently.
Match the cell to the crop and to how long you intend to hold the seedling. Tomato, capsicum, chilli and cucurbits are hungry and are usually held for several weeks, so they want the larger cells. Cabbage, kale, sukuma and other brassicas do well in mid-range cells. Onions and leeks are narrow-leaved and tolerate small cells because they are grown almost as a grass before transplanting.
Two further checks when buying. Deep cells with a taper and a drainage hole at the base produce better plugs than shallow, straight-sided ones, because the taper lets the plug slide out cleanly. And a tray that can be washed and reused for several seasons is cheaper per crop than a flimsy one you replace annually. Our planting trays in the farm equipment range come in the common cell counts, and our team can advise which suits the crops you actually grow.
The Medium: Never Use Raw Garden Soil
The single most common nursery failure in Kenya is filling trays with soil from the shamba. Field soil compacts into a dense brick inside a small cell, which starves roots of air, holds water where you do not want it, and carries the pathogens you bought the tray to escape.
A nursery medium has a different job from soil. It must hold water and air at the same time, stay light so a full tray can be carried, drain freely, and be effectively free of disease and weed seed. Coco peat, made from coconut husk, is the widely available base in Kenya and does most of that work well. Adding vermiculite or perlite improves air-holding and drainage, and a small proportion of well-finished, sieved compost adds a little nutrition and biological life.
Coco peat quality varies. Poorly rinsed material can carry high salt levels from processing, which shows up as seedlings that germinate and then stall with scorched leaf edges. If in doubt, soak and rinse the block thoroughly before use, and buy from a supplier who can tell you how the material was processed.
Fill the trays without compressing. Overfill, then strike the surface level with a straight edge and tap the tray once to settle the medium; pressing it down with your palms squeezes out the air space you paid for. Wet the filled tray before sowing, so the seed goes into moist medium rather than dust.
Sowing: Depth, One Seed per Cell, and the First Week
Sowing depth follows an old rule that holds up well: plant a seed about two to three times as deep as it is wide. Tomato and brassica seed goes in shallow, big cucurbit seed goes deeper, and very fine seed is pressed onto the surface and barely covered. Sowing too deep is the more common error, and it produces cells that never emerge at all.
Make a uniform dibble hole in each cell using a dibble board, a pencil or the end of a stick marked to depth. Uniform depth means uniform emergence, and uniform emergence is most of what makes a nursery look professional. Drop one seed per cell for expensive hybrid seed, cover, and mist gently.
Germination needs warmth and constant moisture. Stacking trays or covering them with a light sheet holds humidity while the seed swells and the radicle emerges. Then comes the step that separates good nurseries from disappointing ones: uncover and move the trays into full light the moment the first shoots appear. Seedlings kept warm and dark after emergence stretch toward the light, producing long, pale, weak stems that never fully recover. Etiolated seedlings transplant badly and lodge in the first strong wind.
Water, Airflow and Beating Damping Off
Damping off is the collapse of young seedlings at soil level, caused by fungal and fungus-like pathogens that thrive in cool, wet, still, overcrowded conditions. It appears as seedlings that keel over with a pinched, water-soaked stem base, often taking out a patch of a tray in a day or two.
Almost every control measure is environmental rather than chemical. Use clean media and wash and disinfect trays between cycles, because pathogens overwinter in old medium stuck in cell corners. Water in the morning with a fine rose or mister so foliage and the surface dry before nightfall. Water enough to moisten the plug and no more, since standing wet medium is the condition the pathogen needs. Keep air moving through the nursery instead of sealing it up. And resist heavy nitrogen feeding on very young seedlings, which produces soft tissue that collapses easily.
Once true leaves appear, the seed's own reserves are spent and the seedling needs feeding. A dilute soluble fertiliser applied through the watering, at the rate the product specifies for seedlings, keeps growth steady. Weak and frequent beats strong and occasional, because a small cell holds very little buffer and a heavy dose burns roots.
Shelter: Shade Net, Insect Net and Getting Trays Off the Ground
A nursery structure does not need to be elaborate, but three elements repay their cost quickly.
Shade netting takes the edge off the fierce midday sun that can cook a shallow tray in an hour, and reduces the watering frequency. Moderate shade is the goal, not deep gloom, because seedlings still need strong light to stay stocky.
Insect netting is the element most farmers skip and most regret. Whiteflies, aphids and thrips are not only feeding pests; they are vectors that carry viral diseases into your crop while it is at its most vulnerable. A tomato seedling infected with a whitefly-transmitted virus in the nursery carries that infection into the field, and there is no cure once it is planted. Fine mesh over the nursery is a one-off cost that protects every batch you raise afterwards. This is exactly the logic that makes protected cropping pay, which we cover in our guide to greenhouse farming equipment.
Benches lift trays off the soil. That keeps splash-borne soil pathogens away from the plugs, stops roots escaping through the drainage holes into the ground, and lets air circulate underneath so roots are naturally pruned at the hole rather than spiralling. Benching also saves your back over a long sowing session.
Hardening Off: The Week That Decides Field Survival
A seedling raised under shade with regular water is soft. Its cuticle is thin, its stem is tender, and its roots have never had to search for moisture. Planted straight into an open field at midday, it wilts badly, and the check can cost a week or more of growth.
Hardening off deliberately toughens the plant before it moves. Over roughly five to ten days before transplanting, gradually increase exposure to direct sun and wind and reduce watering, allowing the plugs to approach dryness between waterings without ever wilting hard. The plant responds by thickening its cuticle, stiffening its stem and building root mass relative to shoot.
Transplant readiness is judged by the plant, not the calendar. Most vegetable seedlings are ready at around three to five true leaves, with a root system that holds the plug together when you push it out. As a rough guide to planning, tomatoes and brassicas typically spend three to four weeks in the tray, capsicums and chillies rather longer, and onions longer still. Use your own records from previous batches, since variety, altitude and season all shift the timing.
Transplanting Without a Check
Time the move for late afternoon or an overcast day, so the seedling gets a cool night to settle rather than a hot afternoon to survive. Water the trays thoroughly an hour or two before lifting; a moist plug slides out whole, a dry one crumbles and takes the roots with it.
Push each plug out from the base rather than pulling the stem. Hold seedlings by a leaf if you must hold them at all, because a crushed stem is fatal while a damaged leaf is replaceable. Plant to the same depth the seedling grew at, with the important exception of tomatoes, which can be set deeper because they form roots along the buried stem and end up better anchored.
Firm the soil gently around the plug so there is contact without compaction, then water in immediately at the base of each plant. That first watering does two jobs: it supplies water and it settles soil against roots, closing the air pockets that dry a plug out from below. A seedling transplanter speeds the whole operation and keeps planting depth and spacing consistent, which matters over hundreds of plants when backs get tired and standards slip.
Keep water steady through the first week while roots grow out of the plug into the surrounding soil. This is where a drip line earns its keep, delivering moisture at the base without wetting foliage, and our comparison of drip irrigation and sprinklers covers how to choose between them for your plot.
Key Takeaways
- Trays remove three specific losses: soil-borne disease, root damage at lifting, and seed wasted by broadcast sowing.
- Match cell size to crop and holding time. Larger cells for tomato and capsicum, mid-range for brassicas, small for onions.
- Never fill trays with field soil. Use coco peat with vermiculite or perlite and a little sieved compost, and fill without compacting.
- Sow about two to three times as deep as the seed is wide, one seed per cell for expensive hybrids, at uniform depth.
- Move trays into full light the day shoots appear. Seedlings kept dark after emergence stretch and never fully recover.
- Beat damping off with clean trays, morning watering, spacing and airflow rather than with chemicals.
- Insect netting keeps out the whiteflies, aphids and thrips that carry viruses your crop cannot be cured of later.
- Harden off over five to ten days with more sun and less water before the plants go out.
- Transplant late in the day from a well-watered tray, push plugs out from below, and water in immediately.
Frequently Asked Questions
Can I use garden soil in seedling trays?
No. Field soil compacts inside a small cell, cutting off the air roots need, and it carries the pathogens, nematodes and weed seed that the tray is meant to avoid. Use coco peat based media with vermiculite or perlite for drainage and a small share of sieved mature compost.
Why are my seedlings tall, pale and floppy?
They are etiolated, which means they stretched looking for light. It almost always follows leaving trays covered or in shade after germination. Move trays into full light on the day the first shoots appear, and give strong light with moderate shade only against the harshest midday sun.
How do I stop damping off in my nursery?
Control the environment rather than reaching for chemicals. Use clean media and disinfected trays, water in the morning with a fine rose so surfaces dry before night, avoid waterlogging the plugs, keep trays spaced with air moving between them, and go easy on nitrogen feeding while seedlings are very young.
How long before transplanting should I harden off seedlings?
Around five to ten days. Gradually increase exposure to direct sun and wind and reduce watering so the plugs approach dryness between waterings without hard wilting. The plant thickens its cuticle and stem, which is what carries it through the first week in the field.
What nursery equipment does Fuga supply?
Planting trays in the common cell counts, seedling transplanters, watering cans, knapsack and hand sprayers, irrigation kits and greenhouse hardware. Tell us the crop and the number of plants you need per cycle on WhatsApp at wa.me/254716961018 or call 0734263958 for a current quote, or visit any branch in Nairobi, Eldoret, Nakuru or the Coast.