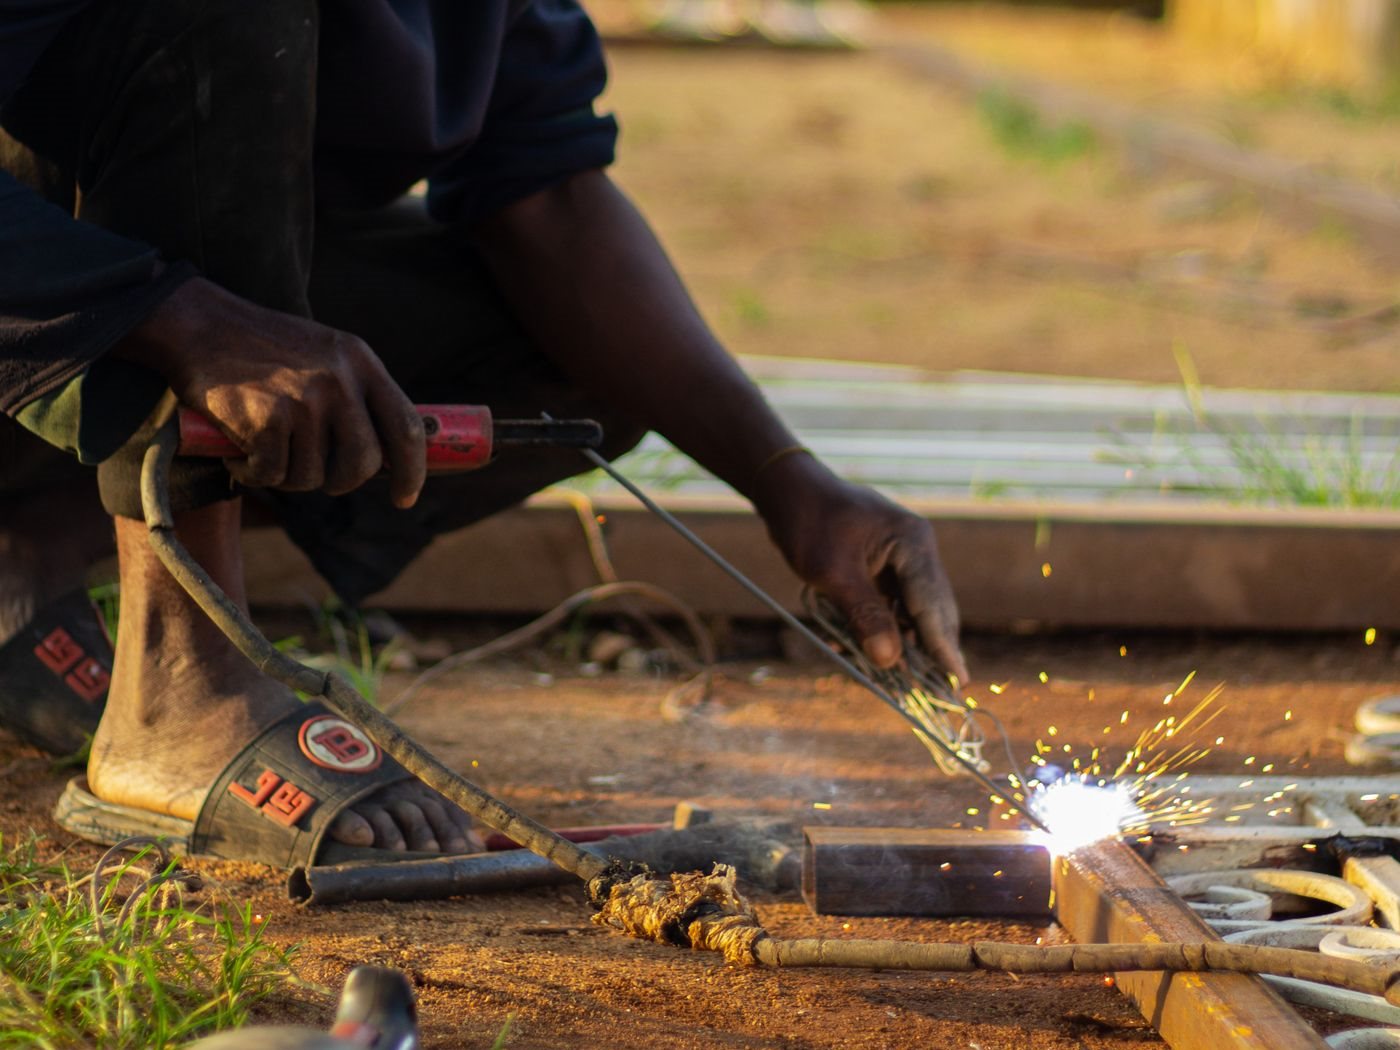
A jua kali welder delivers a pair of gate leaves to a plot in Kitengela. Every piece was cut to the right length, every weld is sound, and yet the gate will not close. One leaf sits a finger's width higher at the latch end than the other, and when it swings it scrapes the ground. The steel is not the problem and the welding machine is not the problem. The frame went out of square while it was being welded, and nobody checked until it was too late to fix cheaply.
Welded frames, whether gates, poultry cages, tank stands, workbench legs or machine stands, are judged on two things the customer can see at a glance: is it square, and is it flat? Both are decided less by how well you weld than by how you hold the parts, how you measure, and the order in which you put the heat in. Those three habits cost very little, and the cheapest tool that helps with all of them is a magnetic welding holder.
This guide covers how to use magnetic holders and clamps properly, the measuring routine that proves a frame is square before it is welded, the tack and weld sequence that keeps it square while it cools, and how to correct a frame that has started to move. It assumes you already have a welder and rods; for those, see our guides to welding machines for a rural workshop and choosing the right welding rod.
Why Welded Frames Pull Out of Square
Every weld is a small amount of molten steel that shrinks as it cools. Steel expands when hot and contracts as it cools, and the weld bead and the metal right beside it contract more than the cold steel around them. That shrinkage pulls the joined parts toward the weld. This movement is called distortion, and it is normal physics, not a sign of bad welding.
On a frame, distortion shows up in three ways. A corner welded on one face only closes up on that face, so the two members are no longer at 90 degrees. A long run of weld along one side of a member bows it toward the weld. And a frame welded fully on one face before the other can twist, so one corner lifts off the floor. The more heat you put into one place at one time, the bigger the pull.
The good news is that distortion is predictable. If you know heat pulls toward the weld, you can hold the parts so they cannot move, balance the heat so the pulls cancel, and check the frame at the stages where a correction is still easy.
What a Magnetic Welding Holder Does, and What It Does Not
A magnetic welding holder, often called a welding magnet or arrow magnet, is a flat permanent magnet shaped so that its edges sit at fixed angles, usually 45, 90 and 135 degrees. Stick it inside a corner and it holds two pieces of angle, flat bar or square tube at that angle while you tack them. It frees a hand, it is quick to place, and it gives a repeatable angle on every corner of the frame.
Use it well and it saves a lot of time. Use it for the wrong job and it causes the very errors you bought it to prevent. Keep these points in mind:
- It positions, it does not restrain. The holding force of a small magnet is modest. It will hold light sections in place for tacking, but it will not stop a hot weld from pulling the joint. Tack, then remove the magnet before running full welds.
- Keep it back from the arc. A magnet close to the weld can deflect the arc, a problem welders call arc blow, which makes the bead wander. Place the holder a few centimetres away from the joint, on the inside of the corner.
- Keep it cool. Heat weakens permanent magnets. A magnet left touching a joint while it is welded can lose holding strength for good.
- Keep it clean. Magnets collect grinding dust, filings and spatter. A dirty face does not sit flat, and the corner will be off by the thickness of the grit. Wipe it before every use.
- Check its angle. Hold each magnet against a reliable square before you trust it on a job. If one is out, mark it and use it only for holding, not for setting the angle.
The 3 inch and 4 inch holders on our price list suit most farm and gate fabrication. The larger face sits more steadily on bigger sections such as 50 mm angle or square tube. A set of four, one for each corner, lets you set a whole frame before striking the first tack.
Clamps, a Flat Surface and Stop Blocks
Magnets set the angle; clamps hold the work down. A frame that is not clamped to something flat will take on the shape of whatever it is lying on, and a frame laid on uneven ground in the yard will be twisted before the first weld.
The fix is a flat reference surface. In a workshop that means a steel welding table or a heavy steel plate laid level. On site it can be a pair of straight, heavy sections such as I-beams or thick channel, laid parallel and checked level with a spirit level, with the frame resting across them. Clamp each corner of the frame down to that surface with G-clamps or locking pliers before tacking. Our guide to measuring and layout tools explains how to check a spirit level is true before relying on it.
For repeat work, such as a run of identical cage frames, weld a few scrap stop blocks to the table to form a jig: the pieces drop into the same place every time, and every frame comes out the same. Cutting matters just as much. If the members are not square-ended and equal in length, no magnet will rescue the frame. Our comparison of the cut-off saw and angle grinder for cutting steel covers how to get square, repeatable cuts.
The Measuring Routine: Prove It Square Before You Weld
The single most useful check in fabrication is the diagonal check. Measure a rectangular frame from one corner to the opposite corner, then across the other two corners. If the two diagonals are equal, the frame is square. If they differ, the frame is a parallelogram, leaning toward the shorter diagonal.
The routine that works on every frame:
- Check the members. Measure each cut piece before assembly. Opposite sides of a rectangle must be equal, or the diagonals will never agree.
- Lay out, magnet and clamp. Set the frame on the flat surface, place a holder in each corner, and clamp lightly so the frame can still be nudged.
- Measure both diagonals. Hook the tape on the same point of each corner, for example the outside tip, every time. A tape hooked on the inside at one corner and the outside at the other gives a meaningless number.
- Correct. If one diagonal is longer, push or tap that pair of corners toward each other. Re-measure until the two match as closely as your tape can show.
- Check for twist. Stretch two strings across the diagonals from corner to corner. On a flat frame the strings just touch where they cross. If one string sits clear of the other, a corner is lifted; shim or clamp it down.
- Clamp firmly and tack. Only now strike the first tacks.
For a single corner without a full frame to measure, use the 3-4-5 rule: mark 600 mm along one member and 800 mm along the other. When the distance between the two marks is exactly 1000 mm, the corner is square. It works at any multiple of 3, 4 and 5.
Tack Sequence: Small, Balanced, Then Check Again
A tack weld is a short weld, often only a centimetre or so long, that holds the parts in place until the full welds are run. Tacks should be small enough to break and re-do if the frame moves, but strong enough not to crack when the frame is handled.
The order matters. Tack one corner, then the diagonally opposite corner, then the remaining two. This spreads the small pulls of the tacks across the frame instead of letting them accumulate on one side. After the four corners are tacked, measure the diagonals again. Tacks do pull, and this is the last cheap moment to correct: break a tack, adjust, and re-tack.
Full Welds Without Losing Square
With the frame tacked and checked, remove the magnets and leave the clamps on. Then run the full welds in the same crossing order as the tacks. A few habits keep distortion small:
- Weld short and spread out. On a long joint, run short lengths of weld in different places rather than one long continuous bead from end to end. Less heat in one place means less pull in one place.
- Balance the faces. Weld one face of each corner, turn the frame over, and weld the other face. A frame fully welded on one face before the other is turned is the classic cause of twist.
- Do not over-weld. A bigger bead does not make a stronger frame if the joint is already fully fused; it just adds heat and shrinkage. Size the weld to the material.
- Let it cool naturally. Splashing water on a hot joint cools one side faster than the other and can add to the distortion. Let the frame cool in the clamps.
- Check again before unclamping. Measure the diagonals with the frame still clamped and again after release. A small spring-back is normal; a large one tells you the sequence needs changing next time.
An experienced fabricator will also preset a joint: set it slightly open, by a degree or so, on the side the weld will pull, so that shrinkage pulls it to exactly square. This is learned by trying it on scrap with your own machine, rods and sections, and noting how much each joint moves.
Rods, Machine and the Kit to Do It
For light gate and cage work in thinner angle and tube, the 2.5 mm rod puts less heat into the joint, which means less burn-through and less distortion. The 3.2 mm rod suits heavier sections like stand legs and thicker angle. Set the current within the range on the rod packet and adjust by the sound and look of the arc; our welding rod guide explains rod types and storage, and the welding machine guide covers power supply and generators.
Current Fuga prices from our price list (confirm before buying, as prices and pack sizes can change):
| Item (as listed) | Price | Role in square fabrication |
|---|---|---|
| MAGNETIC WELDING HOLDER 3" 25LBS | 300 KSH | Sets corners at 45, 90 or 135 degrees on light sections |
| MAGNETIC WELDING HOLDER 4" 25LBS | 550 KSH | Larger face, steadier on bigger angle and tube |
| INVERTER MMA WELDING MACHINE 160A | 15,500 KSH | Stick welder for farm and gate fabrication |
| WELDING RODS 2.5MM | 4,500 KSH | Thinner sections, lower heat input; ask for the pack size |
| WELDING RODS 3.2MM | 1,050 KSH | Heavier sections; ask for the pack size |
| ELECTRODE HOLDER | 900 KSH | Replacement holder for the welding lead |
| MEASURING TAPE 7.5M/24FT | 200 KSH | Long enough to read the diagonal of a gate leaf |
| FLAP DISK 4.5MM | 180 KSH | Deburring cut ends and dressing finished welds |
Protect Yourself While You Do It
Much fabrication in Kenya is done squatting in a yard in sandals with bare hands, and many welders carry the scars to show it. Arc welding throws hot spatter and slag, and the arc emits intense ultraviolet light that burns unprotected skin and causes arc eye, a painful burn to the surface of the eye that often shows up hours after welding. Wear a welding helmet or shield with the correct shade filter, leather gauntlets, closed leather boots, and long sleeves in cotton or another natural fibre, never synthetics that melt. Keep bystanders, especially children, from watching the arc. Our farm and workshop safety equipment guide covers helmet shades and gloves.
Chipping slag from a fresh weld sends hot fragments flying, so keep your eye protection on after the helmet comes up. And as with grinding, look around for smouldering material before you leave the work area.
Square frames are a habit, not a talent. Cut true, set the corners with magnets, clamp to something flat, check the diagonals, tack across, check again, and weld across. Ask at any Fuga branch or on WhatsApp 0716 961 018 for magnetic holders, rods and welders matched to the sections you work with.
Key Takeaways
- Frames go out of square because weld metal shrinks as it cools and pulls the parts toward the weld; that is predictable and can be controlled.
- Magnetic welding holders set corner angles for tacking, but they do not restrain a hot weld: keep them back from the arc and remove them before full welds.
- Clamp the frame to a flat, level surface; a frame laid on uneven ground is twisted before the first weld.
- Equal diagonals mean a square frame. Measure them before tacking, after tacking and after welding.
- Tack and weld opposite corners in turn, weld both faces, use short spread-out welds, and let the frame cool in the clamps.
- Wear a shaded helmet, leather gloves and closed boots; sandals and bare hands are common in yards and cause avoidable burns.
Frequently Asked Questions
Are magnetic welding holders strong enough to hold a frame while welding?
They are strong enough to hold light sections in position for tacking, but not to stop a full weld from pulling the joint as it cools. Use them to set the angle, clamp the frame to a flat surface, tack the corners, then remove the magnets and leave the clamps on for the full welds. Keep magnets a few centimetres from the joint so they do not deflect the arc or overheat.
How do I check a welded frame is square?
Measure both diagonals, corner to corner, hooking the tape on the same point of each corner. If the two diagonals are equal, the frame is square. If one is longer, push that pair of corners toward each other until they match. For a single corner, use the 3-4-5 rule: 600 mm along one member, 800 mm along the other, and exactly 1000 mm between the marks.
Why does my gate twist after welding?
Usually because it was welded fully on one face before being turned, or because it was laid on uneven ground while welding. Clamp the frame to a flat, level surface, tack all corners, check for twist with two strings stretched across the diagonals, then weld a little on each face in turn and let it cool in the clamps.
Should I use 2.5 mm or 3.2 mm welding rods for gates?
For thinner angle and tube, the 2.5 mm rod puts less heat into the joint, which reduces burn-through and distortion. The 3.2 mm rod suits heavier sections such as stand legs and thicker angle. Set the current within the range on the rod packet. Our welding rod guide explains rod types and why rods must be kept dry.
Can I cool a weld with water to speed up the job?
It is better not to. Splashing water on a hot joint cools one part faster than another and can add to the distortion you are trying to control. Let the frame cool naturally in its clamps, and measure the diagonals again before and after releasing them.