Picture a small workshop building a feeder frame for a poultry house. Eight lengths of angle iron, cut freehand with a grinder, land on the bench looking fine. Then the welder tries to close the rectangle and the last corner will not meet. Two cuts were a few degrees off square, so one leg is short at the top and long at the bottom, and the finished frame rocks on the floor. The fix is more grinding, a shim of scrap under the weld, and an hour lost.
Cutting steel is where most fabrication problems begin. A weld can only join what the cut prepared, and a cut that is out of square or out of length is carried through every joint after it. For gates, cages, brooder guards, feeder frames and trailer repairs, the difference between a tidy job and a wobbly one is usually decided at the cutting bench, not at the welder.
This guide compares the three ways a Kenyan workshop cuts bar, tube and angle: the cut-off saw, the angle grinder and the hacksaw. It explains what each is good at, how disc size sets depth of cut, why clamping matters more than a steady hand, how to manage sparks and fire, when a disc is finished, and it ends with a sample workflow for building a square feeder frame.
What Each Machine Actually Does
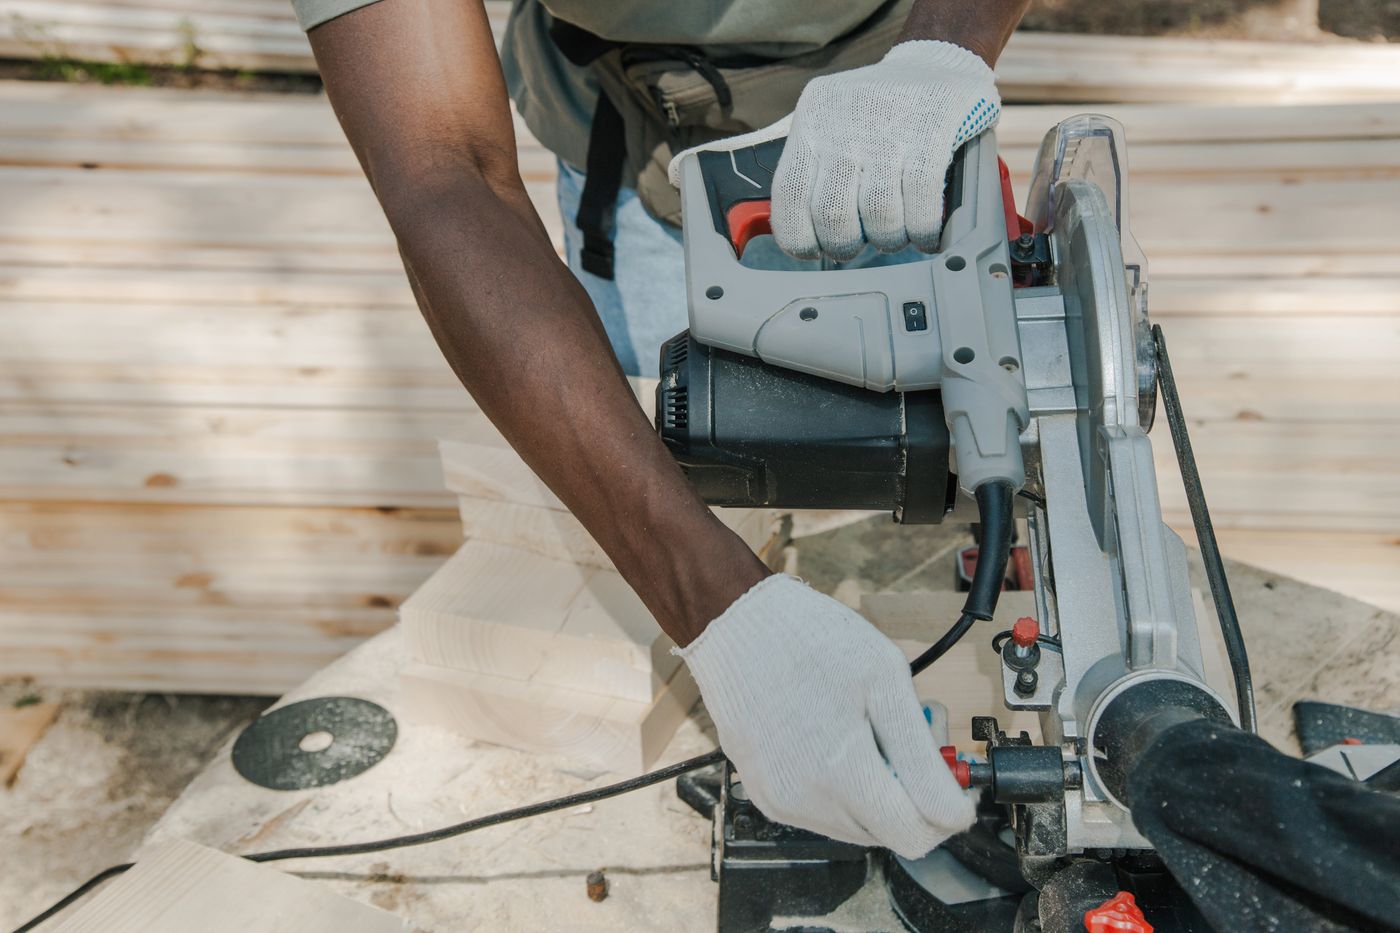
A cut-off saw, also called a chop saw, is a motor and a large abrasive disc mounted on a pivoting arm above a base with a built-in vice. The work is clamped in the vice, the arm is pulled down, and the disc passes through the steel at a fixed angle to the base. The machine, not the operator, holds the angle.
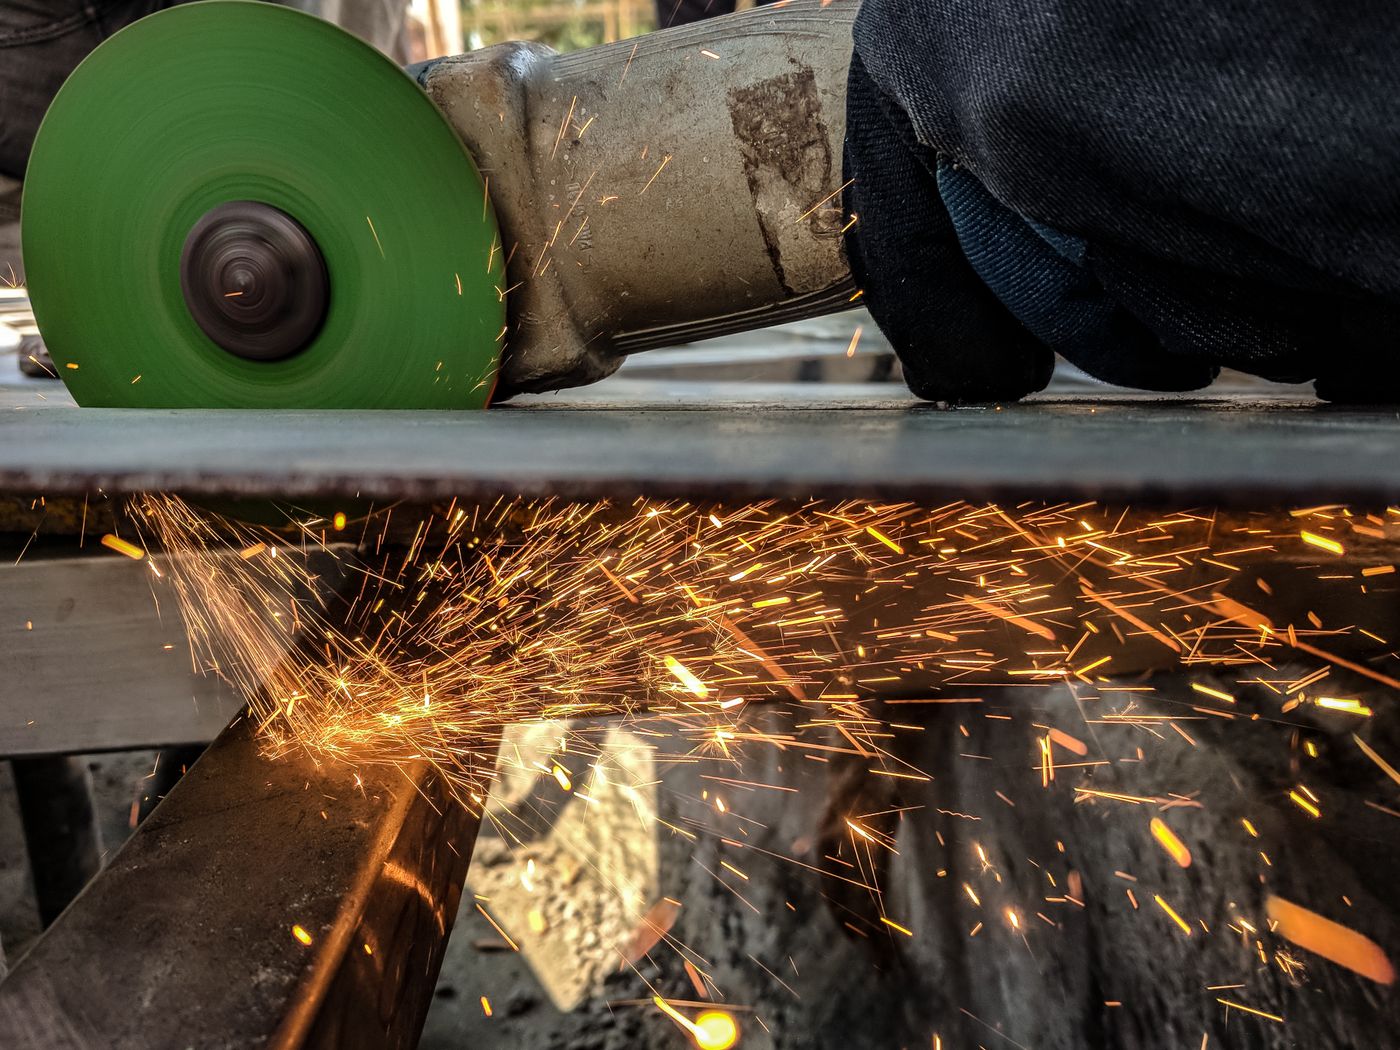
An angle grinder is a handheld motor with a small disc turning at right angles to the body. With a thin cutting disc fitted it will cut steel; with a grinding disc or a flap disc it will shape and clean the same steel. The operator's two hands are the only thing holding the angle, which is its great weakness for straight cuts and its great strength everywhere else.
A hacksaw is a hardened steel blade in a frame, driven by the arm. It is slow, but it needs no power, throws no sparks and leaves a clean cut in thin tube that an abrasive disc would tear. Every workshop should still have one on the wall.
Where the Cut-Off Saw Wins
The chop saw wins whenever you need the same cut, square, many times. Its vice holds the bar at a true right angle to the disc, and most machines swivel the vice to cut mitres, typically up to 45 degrees, for the corners of a frame. Once the angle is set, every piece that goes through the vice comes out at that angle, whether the operator is fresh or tired.
That repeatability is what gate, cage and frame work depends on. A gate has two uprights that must be identical and rails that must all be the same length, or the diagonal brace will never sit flat. A battery of layer cages is dozens of identical short lengths. A feeder or drinker frame is four legs and four rails, and the legs must match to the millimetre or the whole thing rocks.
The saw also cuts faster on repeat work because there is no measuring twice. Clamp a stop block to the base at the length you want, slide each bar up to it, clamp and cut. The measuring tape comes out once. Our guide to measuring and layout tools covers the squares and tapes that make that first measurement trustworthy.
- Frames of any kind: feeder stands, brooder guards, table bases, cage batteries, gate leaves.
- Cut lists with repeats: ten legs, twenty rails, forty cage dividers, all the same length.
- Heavier sections: solid bar and thick angle that would take several passes with a small grinder.
- Anyone who welds: a square cut means a tight fit-up, which means a sound weld with less filler.
Where the Angle Grinder Wins
The grinder wins wherever the steel cannot come to the bench. A rusted bolt on a trailer, a gate hinge that must be cut off in place, a tank stand being altered where it stands, a fence post already set in concrete. The saw cannot go there. A grinder on a long extension cable, or a cordless grinder, can.
It also wins on awkward angles and shapes. Notching a tube so it sits over another, cutting a slot, trimming a plate to a curve, or opening a hole in sheet are all grinder jobs. The saw cuts one straight line and nothing else.
And the grinder wins after the cut. Every abrasive cut leaves a burr, a sharp lip of pushed-over metal on the underside, and a weld leaves spatter and a raised bead. Swap the cutting disc for a grinding disc or a flap disc and the same tool cleans the edge, bevels it for welding and dresses the finished joint. Our guide to angle grinder discs explains which disc does which job and why a thin cutting disc must never be used for grinding.
For a workshop that can afford only one machine, the grinder is the more versatile buy, and a frame can still be built with it if every piece is clamped and marked with a square. For a workshop that builds frames every week, the cut-off saw pays for itself in the hours it saves and the joints it does not spoil.
Disc Diameter Sets Depth of Cut
The depth a disc can cut is roughly the distance from the disc edge to the flange that holds it, less what the guard takes. A disc can never cut deeper than its own radius, and in practice cuts well short of it. This is why the disc size on the machine matters more than the motor power.
A common 355 mm cut-off saw disc will pass through solid round bar and square tube of a size that a 115 mm grinder disc cannot approach in one pass. Check the rated capacity printed on your machine for the exact figures, and note that the capacity for angle iron and rectangular tube depends on how the section is clamped. A 115 mm grinder disc, the most common size in Kenyan workshops, cuts only a few centimetres deep, so a large section has to be cut from two or more sides and the cuts must meet. A 230 mm grinder cuts deeper but is heavy and demands more of the operator.
Depth also falls as the disc wears. A new 355 mm disc and a worn one two thirds of its diameter are effectively two different machines. If a cut that used to go through in one pull now stalls with a sliver of steel uncut, the disc has worn below the job, not the motor.
Clamping, the Vice and Why the Work Must Not Move
Almost every bad cut and most cutting injuries come from work that moved. A bar held by hand or under a foot against a grinder disc will twist as the disc bites, the kerf (the slot the disc cuts) closes on the disc, and the disc either jams and kicks the tool back at the operator or shatters.
On the saw, the vice does the holding. Seat the bar flat on the base, push it firmly against the fixed jaw, and tighten the screw until it cannot be shifted by hand. For angle iron, clamp it so that the disc enters the thick corner last, not first, because entering at the corner drives the disc against the hardest part of the section at the moment it has the least support. Long bar needs a support at the same height as the saw base, a trestle or a block, so the far end cannot lift or drop and pinch the disc.
On the grinder, the work still needs to be held by something other than the operator. A bench vice, a pair of G-clamps to the bench edge, or a pipe clamp for round tube. Position the cut so the offcut can fall away freely without closing the kerf. Cut with the disc's rotation throwing sparks away from you, keep both hands on the tool, and never remove the guard to get a deeper cut.
Sparks, Fire and the Wet-Season Temptation
Abrasive cutting throws a stream of red-hot steel particles several metres in the direction the disc is turning. They are not harmless glitter. They will ignite sawdust, dry grass, a feed sack, a rag soaked in oil, and the plastic bag under the bench. They will also pit glass, burn holes in a tarpaulin, and scar the paint of the customer's motorbike parked across the yard.
In the dry season most people cut outside, where sparks land on bare ground. The trouble comes in the rains, when the same work moves indoors into a store full of the things sparks love. The wet-season rule is to cut at the doorway, disc turning toward the open air, with a steel sheet or a wet sack as a spark screen, and to move everything flammable out of that arc before the first cut. Keep a bucket of water or a fire extinguisher within reach and check the floor for smouldering material ten minutes after the last cut.
Sparks also burn eyes and skin. Impact goggles or a face shield, leather gloves, long sleeves in a natural fibre, and no synthetic shirts that melt onto the skin. Ear protection matters too, because a chop saw is loud enough to damage hearing over a working day. Our guide to farm and workshop safety equipment covers what to buy and how to make sure it gets worn.
Disc Wear, Replacement and the Hacksaw
An abrasive disc is grit bonded in resin, and it cuts by wearing itself away. That is normal. What is not normal is a disc that has been dropped, stored damp, or left on a machine outside where dew reaches it. Resin bonds weaken with moisture and time, and a weakened disc can burst at full speed. Bonded abrasive discs carry a use-by date printed on the metal centre ring; a disc past that date goes in the bin, however new it looks.
- Before each fitting: look for cracks, chips at the edge, and any sign the disc has been wet. Tap a chop saw disc gently and listen for a clear ring rather than a dull note.
- Replace when: the disc has worn so small that depth of cut is gone, it cuts noticeably slower, it wanders in the cut, or it has been jammed hard in a kerf.
- Fit the right disc: match the disc's rated speed to the machine, and never fit a smaller disc on a larger machine, which spins it faster than it was made for.
- Store flat and dry, away from the wall where rain blows in, and out of the sun that dries out the resin.
The hacksaw earns its place for the odd cut that does not justify starting a machine: one bolt, one short piece of thin tube, a cut in a confined space where a disc cannot reach, or any cut when the power is off. It also cuts thin-walled tube and light conduit without the heat and tearing an abrasive disc causes. Fit the blade with the teeth pointing away from the handle, tension it properly, and let the stroke do the work.
A Sample Workflow: Building a Square Feeder Frame
Here is how a frame for a trough feeder or a drinker stand comes together in a workshop that has both machines. The same sequence works for a gate leaf or a cage stand.
- Draw it and write the cut list. Four legs, four top rails, four bottom rails, and any bracing. Write the length of each piece and how many, and decide whether the corners are butt joints, which need square cuts, or mitres, which need 45 degree cuts.
- Set the saw once for each length. Clamp a stop block to the saw base, cut one piece, measure it, adjust, then cut every piece of that length without touching the tape again. Group the cut list by length so the stop moves as few times as possible.
- Deburr every end with the grinder. A quick pass with a flap disc removes the burr so the pieces sit flat against each other and the welder is not filling a gap left by a lip of metal.
- Lay out and check the diagonals. Assemble the top frame on a flat surface, clamp it, and measure corner to corner both ways. When the two diagonals are equal the frame is square. Adjust before any weld is struck.
- Tack, re-check, then weld. One tack at each corner, check the diagonals again, then run the full welds in a sequence that spreads the heat rather than pulling one side. Our guide to welding machines for a rural workshop covers the machine side of that step.
- Dress and finish. Grind the welds where they need to be flush, clean off the spatter, and prime the steel before rust sets in.
Whether your workshop needs a cut-off saw for the bench, a grinder for the field and the finish, or both, ask at any Fuga branch or on WhatsApp 0716 961 018 and we will match the disc size to the sections you cut most. Bring a sample of your angle or tube; it settles the depth of cut question in a minute.
Key Takeaways
- The cut-off saw wins on square, repeatable cuts because its vice holds the angle; the grinder wins on site, on awkward shapes and on dressing the cut afterwards.
- Disc diameter, not motor power, sets depth of cut, and the depth shrinks as the disc wears.
- Clamp every cut. Work that moves closes the kerf on the disc and causes most kickbacks, jams and shattered discs.
- Sparks travel metres and start fires after you have left, so manage the spark path, especially when the rains push cutting indoors.
- Bin any disc that is cracked, has been wet or dropped, or is past the use-by date on its centre ring.
- For a frame, cut the whole list against a stop block first, deburr, check the diagonals, tack, then weld.
Frequently Asked Questions
Can I build a square frame with only an angle grinder?
Yes, but every piece has to be clamped and marked with a square, and each cut checked and dressed before welding. A grinder cut is only as square as the operator's hands on that particular pass, so with a long cut list the errors add up. Measure the diagonals of the assembled frame before tacking; equal diagonals mean a square frame. If you build frames regularly, a cut-off saw removes that checking step and pays for itself in time saved.
What size cut-off saw disc do I need?
The 355 mm disc is the common size for workshop cut-off saws and passes through most bar, tube and angle used in farm fabrication in one pull. The exact capacity depends on the machine and on how the section sits in the vice, so check the rated capacity printed on the saw against the largest section you cut. Remember that capacity shrinks as the disc wears, so a job that is near the limit with a new disc will stall on a worn one.
Is it safe to cut steel indoors during the rainy season?
Only with the spark path managed. Cut at the doorway with the disc throwing sparks toward the open air, put a steel sheet or a wet sack behind the cut as a spark screen, move sacks, sawdust, fuel and plastic out of the arc, and keep water or an extinguisher within reach. Check the floor for smouldering material after the last cut, because sparks can sit in sawdust or sacking for a long time before they flame.
How do I know when an abrasive disc should be replaced?
Replace it when depth of cut is gone because the disc has worn small, when it cuts noticeably slower or wanders, when it has been jammed hard in a cut, or when you see any crack or chip. Also bin any disc that has been dropped or stored damp, and any disc past the use-by date printed on its metal centre ring. A weakened disc can burst at full speed, and a new disc costs far less than the injury.
When is a hacksaw the better choice?
For the odd cut that does not justify starting a machine: a single bolt, one short piece of thin tube, a cut in a confined space a disc cannot reach, or any cut when the power is off. It also cuts thin-walled tube and light conduit cleanly, without the heat and tearing an abrasive disc causes. Fit the blade with the teeth pointing away from the handle, tension it properly, and let the stroke do the work rather than forcing it.