
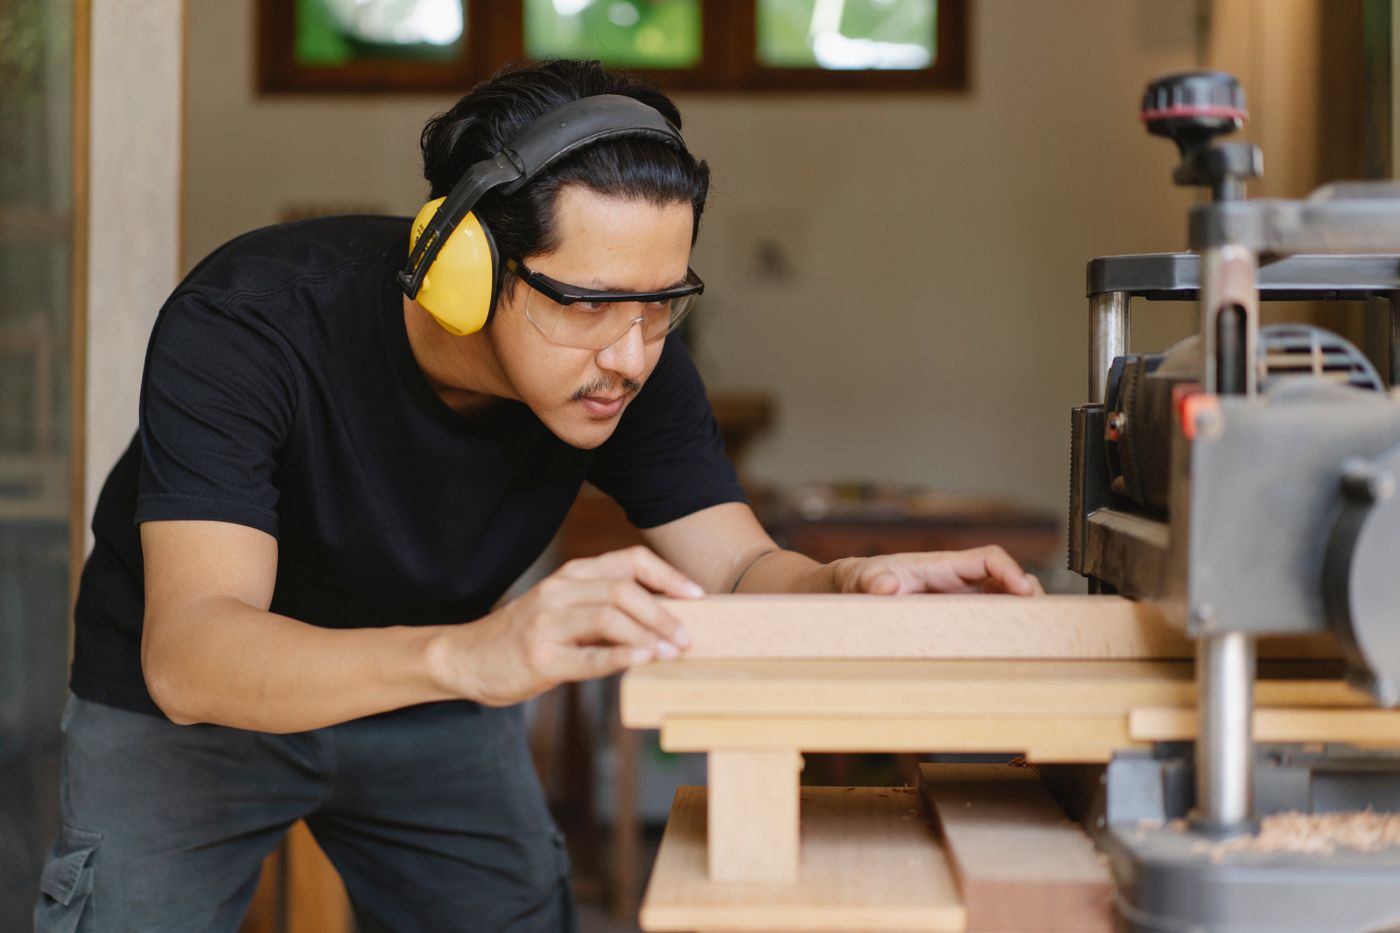
Run your hand along the edge of a table in a roadside furniture yard and you know within a second whether it was planed or only sawn. The sawn edge catches the skin. The planed edge is smooth, square and takes varnish without drinking it. The customer cannot name the difference, but it is the difference they pay for.
Two tools make it in a small joinery shop: the electric planer and the router. They are usually bought together, often confused with each other, and misused in the same handful of ways. Blades run blunt because nobody knew they could be flipped. Bits burn at one speed. Routers jump out of the operator's hands because they were pushed the wrong way along the edge.
This guide covers what each tool does, how deep to cut, how to keep blades and bits alive, which way to feed, what to do about dust and noise, and which tool to buy first when the workshop is a shed with one socket.
Two Tools, Two Completely Different Jobs
An electric planer is a hand plane with a motor. A cutter block, a steel drum carrying two straight blades, spins between a front shoe and a rear shoe. The front shoe is adjustable and sits slightly lower than the rear shoe by the depth of cut you dial in. Push the planer forward and the blades peel off a thin layer the full width of the block, usually 82 millimetres. It flattens rough-sawn faces, straightens edges, brings a door down to fit a frame, and cuts chamfers along a corner.
What a hand-held planer cannot do is make two faces parallel or a board a uniform thickness from end to end. That is the job of a thicknesser, a bench machine that feeds the board under a fixed cutter block on rollers. It is a later purchase, and we come back to it.
A router spins a small shaped cutter, called a bit, held in a collet at very high speed, with the bit projecting below a flat base. Move the base across the wood and the bit cuts whatever shape it has been ground to: a rounded edge, a groove for a drawer bottom, a rebate for a back panel or a pane of glass, a recess for a hinge, or a flush trim on laminate that overhangs a chipboard edge.
Routers come in two forms. A trim router is small, holds 6 millimetre shank bits and is guided with one hand. A plunge router is heavier, has two handles, usually takes 12 millimetre shanks, and can lower a spinning bit into the middle of a panel and lift it out again, which is how you cut a stopped groove.
Depth of Cut: Where Speed Is Bought With Finish
The depth knob on a planer drops the front shoe relative to the rear shoe. The scale typically runs from zero to two or three millimetres, and the temptation is to use the top of it. Resist that. A deep cut makes the motor labour, tears out the grain around knots, and dulls blades faster than any other habit in the workshop.
On soft, straight-grained timber such as cypress or pine, a roughing pass of 1 to 1.5 millimetres is comfortable for a 750 to 1050 watt machine. On dense hardwoods such as mahogany or mvule, keep every pass under a millimetre. For the final pass on anything, drop to half a millimetre or less and let the blades polish rather than cut. Two shallow passes take less time than one deep pass followed by sanding.
Read the grain before you start. Wood planes cleanly when the blades travel "downhill" along the fibres and tears when they lift them. If a pass leaves torn patches, turn the board around and come from the other end. Around a knot, drop the depth and slow down, because the grain runs in every direction at once.
That scooped hollow at each end of a board is called snipe, and it is the most common planer fault in small shops. At the start of a pass only the front shoe is on the wood, so press on the front knob. As the rear shoe comes onto the board, move your weight to the rear handle, so that when the front shoe runs off the far end the planer cannot tip into the cut. Where the ends matter, plane the board a little long and cut the snipe off.
Blade Care: Flip, Then Replace in Pairs
Most planers now use small reversible tungsten carbide blades with two cutting edges. When the first edge dulls, loosen the clamp bar, slide the blade out, turn it around and refit it. Only when both edges are gone does it go in the bin. Many workshops throw away blades with a fresh edge still on them because nobody read that far in the manual.
Always change both blades together. A single new blade sits higher than its worn partner, does all the cutting, leaves a stepped surface, and the unbalanced block vibrates the bearings. Set the new blades with the gauge supplied in the box so the edges sit exactly flush with the rear shoe. A blade set high cuts deeper than the scale says; a blade set low leaves the rear shoe dragging.
You can tell a dull blade before you look at it. The surface comes up fuzzy rather than glossy, burnish marks appear on hard timber, the motor note drops under load, and you find yourself pushing. A dull blade is also more dangerous, because a planer that stalls in the cut is a planer that kicks.
Two habits keep blades alive. Check reclaimed timber and old doors for nails, because carbide is hard but brittle and a nail chips a blade in an instant. And wipe resin off the blades and shoes with paraffin at the end of the day, since built-up pitch turns a sharp edge into a blunt one.
Router Bits, Collets and the Speed Question
The router's collet is the sleeve that grips the bit. Get its size right before you buy a single bit. Common sizes are 6 millimetre, 6.35 millimetre (a quarter inch), 8 millimetre, 12 millimetre and 12.7 millimetre (half an inch). A 6 millimetre shank in a quarter inch collet looks like it fits and then slips under load; a quarter inch shank forced into a 6 millimetre collet ruins the collet. Measure it with callipers and buy bits marked in the same units. Push the shank in fully, then back it out about two millimetres before tightening, so the collet grips the parallel part of the shank.
Bits come in families. Straight bits cut grooves, dados and mortices. Flush trim bits carry a bearing that follows a template or a finished edge and trim laminate to match. Round-over and chamfer bits soften edges. Rebate bits cut the step that receives a back panel or glass. Cove, ogee and V-groove bits are decorative. For a furniture shop, six carbide-tipped bits cover most orders: a 6 and a 12 millimetre straight, a flush trim, a small round-over, a chamfer and a bearing-guided rebate.
Speed is where routers get misunderstood. A bit's rim speed rises with its diameter, so a wide bit at full speed has its cutting edges travelling far faster than a narrow one. That burns the wood, overloads the motor and, with the biggest bits, is dangerous. Small bits under about 25 millimetres run at full speed. Bits over about 50 millimetres need the speed turned down on a variable-speed router, and the largest panel-raising bits belong only in a router table. Larger bits usually have a maximum speed printed on them. Obey it.
Depth follows the same logic as the planer. A rough guide for a 6 millimetre straight bit is about 3 millimetres per pass in hardwood, a little more in soft timber, with deeper grooves cut in steps. Burn marks along a cut mean the feed was too slow or the bit is dull. Clean resin off bits with paraffin and an old toothbrush, never a wire brush on the carbide.
Feeding Direction: The Rule That Keeps the Router in Your Hands
Seen from above, a hand-held router bit spins clockwise. The rule for a safe cut is to feed against that rotation. Fed correctly, the router pushes back against you slightly and the bit holds itself against the edge, and you control the rate.
Fed the other way, in what is called a climb cut, the cutting edges grab the wood and pull the router along the edge faster than you can hold it. It leaves a chattered surface, tears chunks out of corners, and on a big bit it can snatch the tool out of your hands.
The practical rules follow from that. On the outside edge of a board, move the router counter-clockwise around it: left to right on the edge nearest you. Inside a cut-out, clockwise. On a router table the bit is upside down, so feed the wood right to left against the fence. Start the router clear of the wood, let it reach full speed, then ease it in. Clamp the work so both hands stay on the router, and drape the cord over your shoulder.
The planer has its own rules. Feed with the grain, and never draw a running planer backwards over the work, because the blades grab and the machine climbs. Set it down on its parking foot with the block clear of the bench, since the block keeps spinning for several seconds after the trigger is released.
Dust and Noise: The Two Costs Nobody Budgets For
A planer makes chips rather than dust, and a great many of them. A chip bag fills in minutes; a hose to a drum fills the drum instead. Chips on the floor are a slip hazard and, near a welding bay, a fire waiting for a spark. Sweep at every break rather than at the end of the day.
The router is different. On solid timber it also throws chips, but on MDF and chipboard it makes a fine, floating dust that hangs in the air and reaches deep into the lungs. Those boards are bonded with resins, and their dust is worse for you than sawdust. Wear a properly fitted dust mask, route board materials at the open side of the shed with the wind at your back, and connect the router's dust port to an extractor as soon as the workshop can afford one.
Both tools are loud. A router at full speed is one of the noisiest hand tools in a workshop, and a planer in hardwood is not far behind. Hearing damage from that noise is gradual, painless and permanent. Ear defenders and safety glasses go on before the trigger is pulled, every time. Our guide to farm and workshop safety equipment covers what to buy and how to make it stick.
What a Starter Jua Kali Furniture Shop Needs First
Furniture built from rough-sawn Kenyan timber needs to be flat and straight long before it needs a decorative edge. That order decides the shopping list.
The planer comes first. A 750 watt machine handles cypress, pine and most softwood joinery at a comfortable rate. A 1050 watt machine is the better buy if mahogany, mvule or camphor are regular, or if the planer runs all day. On our current price list the electric planer 750W is 7,500 KSH and the electric planer 1050W is 9,800 KSH, so the step up is small against the extra motor.
A trim router comes next, with the six bits above. It rounds edges, cuts drawer grooves, recesses hinges and trims laminate, which is most of what separates a finished piece from a rough one, and it is light enough to use one-handed on a clamped door.
Both sit behind a circular saw and a drill, which cut and fasten the pieces the planer and router refine. If those are not already in the shop, our comparison of the circular saw and the mitre saw and the guide to essential workshop power tools set out the order to buy them in.
Later, and only when a job pays for it: a plunge router with a 12 millimetre collet for heavy profiles and stopped grooves; a router table, which turns the same router into a small spindle moulder for pieces too small to hold; a thicknesser, which is what finally makes every rail and stile in a batch the same size; dust extraction; and sanders. The thicknesser is usually the first bench machine a growing shop buys, because it removes the slowest job in furniture.
Whatever you buy, run it on a short, heavy extension cable. Both tools use universal motors that run slow and hot on a long thin lead, and blow the chips out of the vents at the end of the day so the windings can breathe. Our workshop and industrial tools range covers planers, routers, bits, blades and the protective kit to go with them, across all six branches.
Key Takeaways
- A planer flattens, straightens and thins along the grain. A router cuts profiles, grooves and recesses. Neither substitutes for the other.
- Cut shallow: 1 to 1.5 millimetres roughing in softwood, under a millimetre in hardwood, half a millimetre to finish.
- Planer blades are reversible. Flip before replacing, replace in pairs, and set them flush with the rear shoe.
- Buy router bits to match your collet exactly. Six carbide bits cover most furniture work. Slow the router for bits over about 50 millimetres.
- Feed against rotation: counter-clockwise around outside edges, clockwise inside cut-outs, right to left on a table.
- MDF dust is worse than sawdust and both tools are loud enough to cost you your hearing. Mask, glasses and ear defenders before the trigger.
- Buy the planer first, the trim router second, and the plunge router, table and thicknesser only when a job pays for them.
Frequently Asked Questions
What is the difference between an electric planer and a router?
An electric planer removes a thin, flat layer of wood along the length of a board using two straight blades on a spinning cutter block. It flattens, straightens, thins and chamfers. A router spins a small shaped cutter, called a bit, at very high speed and cuts whatever profile that bit has: rounded edges, grooves, rebates and hinge recesses. If the job is to make wood flat or thinner, use the planer. If the job is to give wood a shape or a groove, use the router.
How deep should an electric planer cut in one pass?
Shallow. On soft timber such as cypress or pine, a roughing pass of 1 to 1.5 millimetres is comfortable for a 750 to 1050 watt planer, and a finishing pass should be 0.5 millimetres or less. On dense hardwoods such as mahogany or mvule, keep every pass under a millimetre. Deep passes make the motor labour, tear the grain and blunt the blades faster.
Which way do you feed a router?
Against the rotation of the bit. Seen from above, a hand-held router bit spins clockwise, so on an outside edge you move the router counter-clockwise around the work, which means left to right along the edge nearest you. Inside a cut-out, go clockwise. On a router table the bit faces up, so you feed the wood right to left against the fence. Feeding the other way is a climb cut, and the bit grabs and pulls the router along faster than you can hold it.
Should a small jua kali furniture workshop buy a planer or a router first?
The planer, in almost every case. Furniture built from rough-sawn Kenyan timber needs flattening and straightening before it needs any decorative edge. A small trim router with a handful of bits comes next, because rounded edges, drawer grooves and hinge recesses are what separate a finished piece from a rough one. A plunge router, router table and thicknesser are later purchases that earn their cost once the order book is steady.