Picture the day your first box of day-old chicks arrives. The matatu drops you at the stage, the box is cheeping, the sun is climbing, and suddenly you realise the chicks needed to be warm and drinking clean water an hour ago, not after you finish setting up. That first 48 hours decides more about your profit than almost anything you will do later in the cycle.
We have watched hundreds of Kenyan keepers start out, and the pattern is remarkably consistent. The ones who struggle did not buy bad birds or bad feed. They arrived with the wrong equipment, the wrong quantity of it, or nothing ready at all, and then spent the first two weeks improvising with jikos, basins and hope. Chick mortality in those flocks is often two or three times what it should be, and every dead chick is money that never comes back.
This guide is the checklist we wish every new customer had before their first chicks. It walks through each category of equipment you actually need, explains the mechanism behind why it matters, and shows you how to size each item to your flock so you neither overspend nor come up short. Whether you are aiming at broilers, layers, or improved kienyeji, the fundamentals below are the same.
Get the Housing and Ventilation Right Before Anything Else
Everything else you buy lives inside the house, so the house comes first. A good poultry structure in Kenya does three jobs at once: it keeps birds dry, it keeps predators and thieves out, and it moves air without creating a draught at floor level where the birds sit.
Ventilation is the part beginners get wrong most often. Birds give off a surprising amount of moisture and ammonia, and if that air does not escape, you get wet litter, respiratory disease and a smell you can detect from the gate. The fix is not fancy: open eaves protected with strong chicken wire mesh, a roof pitch that lets hot air rise and leave, and curtains (usually gunny bags or tarpaulin) you can raise and lower as the weather changes. In the cold highlands around Eldoret and Nakuru you close down at night; on the humid Coast you keep air moving almost constantly.
Plan for roughly a square metre of floor space for every eight to ten mature layers, or a little tighter for broilers that will be harvested young. Overcrowding is a false economy: it spreads disease faster, raises the temperature and the ammonia, and flattens your growth rates. Get the mesh, the curtains and the roofing sorted, then move on to the equipment that goes inside.
Brooding and Heaters: Win the First 21 Days
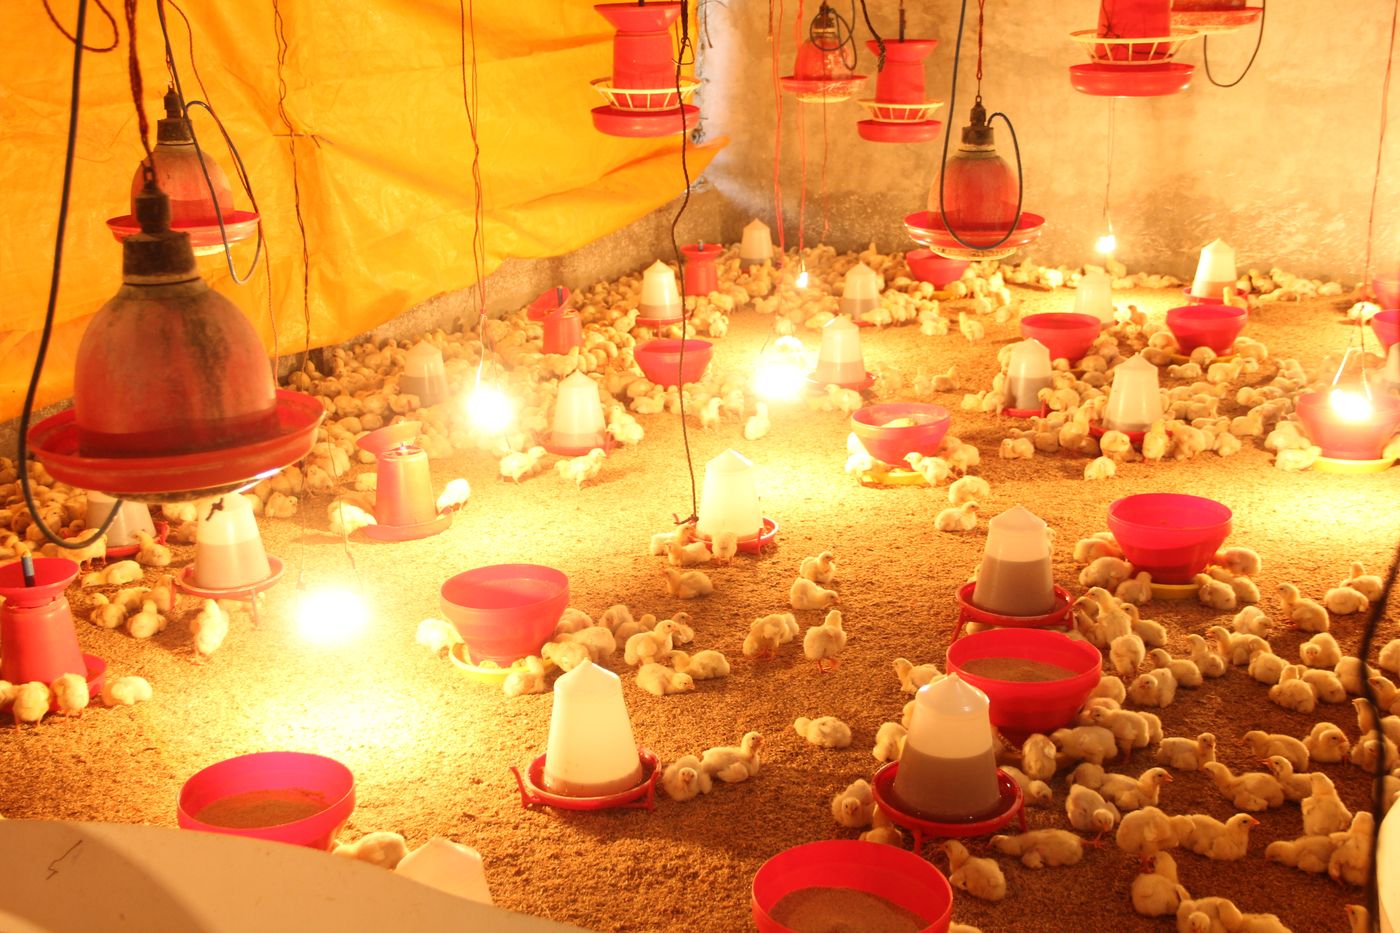
A day-old chick cannot regulate its own body temperature. For the first three weeks it depends entirely on you for heat, and this brooding period is where flocks are won or lost. Aim for around 32 to 35 degrees under the heat source in week one, then step it down by two or three degrees each week until the chicks are fully feathered and can hold their own warmth.
Your heat options in Kenya come down to three, and each suits a different situation. Infrared bulbs and gas brooders give clean, controllable heat and are the standard choice where power or gas supply is reliable. Charcoal jikos are cheap and widely used, but they demand constant attention and carry a real risk of carbon monoxide and fire, so they are the least forgiving. For areas with unreliable grid power, a gas brooder or a solar-backed setup removes the single biggest threat to a brood, which is a cold night when the electricity goes off.
Read the chicks, not just the thermometer. Chicks huddled tightly under the heat are cold. Chicks pressed against the far walls, panting, are too hot. A ring of chicks spread evenly and chirping softly is telling you the temperature is right. The birds are the most accurate gauge you own.
A brooder guard, which is simply a low ring of card or board that keeps chicks in a circle near the heat, water and feed for the first days, is cheap and pays for itself immediately. It stops chicks straying into cold corners where they pile up and smother. Get your brooding gear before the chicks arrive, never the same day, because the house needs to be warm and settled by the time the box is opened.
Feeders: Match the Trough to the Age and Cut Waste
Feed is the largest running cost in any poultry enterprise, so the feeder you choose is really a cost-control tool. A badly designed or badly filled feeder spills feed onto the litter where it is soiled and lost, and that waste quietly eats your margin every single day.
Start chicks on chick feeder trays or shallow linear feeders so the smallest birds can reach in without climbing. As the flock grows, move to tube (hanging) feeders, which hold more feed, reduce spillage, and can be raised on a chain to sit at the birds' back height, the level at which spillage is lowest. A simple rule that serves most keepers well is one feeding space for roughly every 20 to 25 birds, so every bird can eat without a scramble that stresses the flock and stunts the shy feeders.
Never fill a feeder to the brim. Filling it only about a third full at a time dramatically cuts the amount raked out and wasted, and it keeps the feed fresher. Across a full cycle, that discipline alone can be the difference between a thin profit and a comfortable one. You will find the tube feeders, chick trays and linear troughs we stock on the livestock and poultry equipment page.
Drinkers and Nipple Systems: Clean Water Is Free Growth
Birds will not eat well if they cannot drink well, and water is the cheapest input you have. Yet open drinkers are the biggest source of contamination in a poultry house, because birds walk through them, drop litter in them, and spread any disease straight into the shared supply.
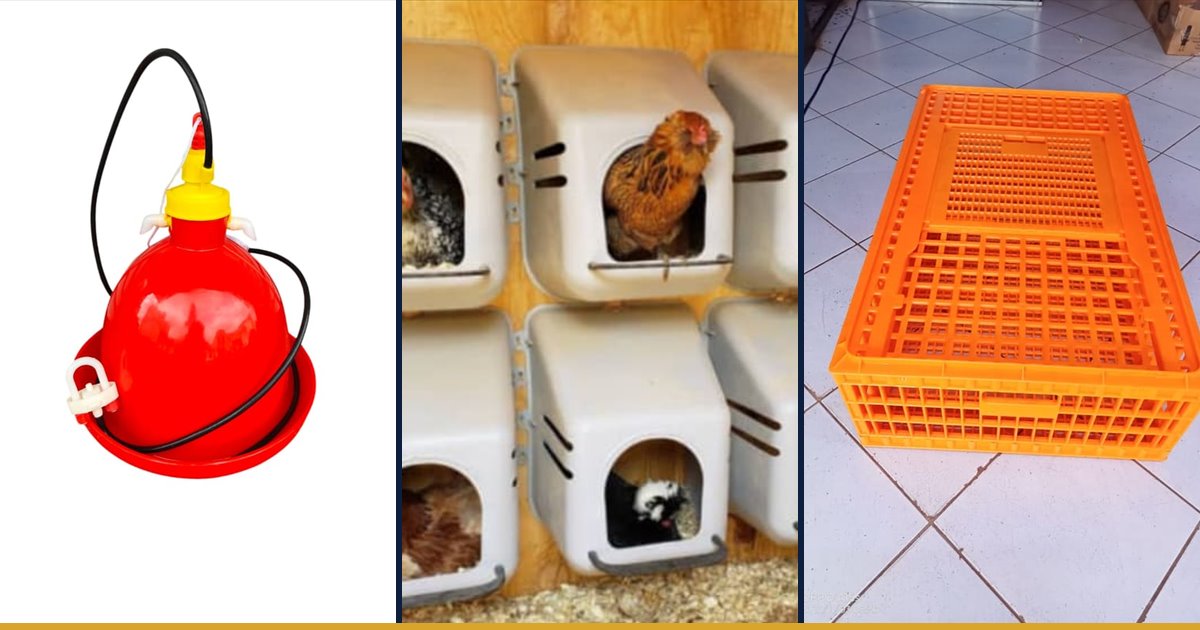
For small and starting flocks, manual bell or fountain drinkers are affordable and simple, but they must be cleaned and refilled at least twice a day. As you scale, an automatic nipple drinking system changes the game: birds peck a valve to release a drop of water, so the water never sits in an open pan collecting muck. Nipple lines cut disease risk, slash the labour of daily washing, and keep litter drier, which in turn keeps the air cleaner. They are one of the highest-return upgrades a growing operation can make.
Position matters as much as the drinker itself. Set drinker height so the birds reach slightly upward to drink, roughly at back height as they grow. Too low and they foul and splash it; too high and the shy birds simply drink less and fall behind. Adjust it every few days as the flock grows.
Plan on about one bell drinker for every 40 to 50 birds, or the equivalent nipple count, and always keep a backup drinker or two in store. If your grid or borehole supply is unreliable, size a storage tank so you always have a day's water in reserve, and speak to us about the tanks, pumps and float valves on the water equipment page. Thirsty birds stop growing within hours, so redundancy here is not a luxury.
Incubation: Only If You Plan to Hatch Your Own
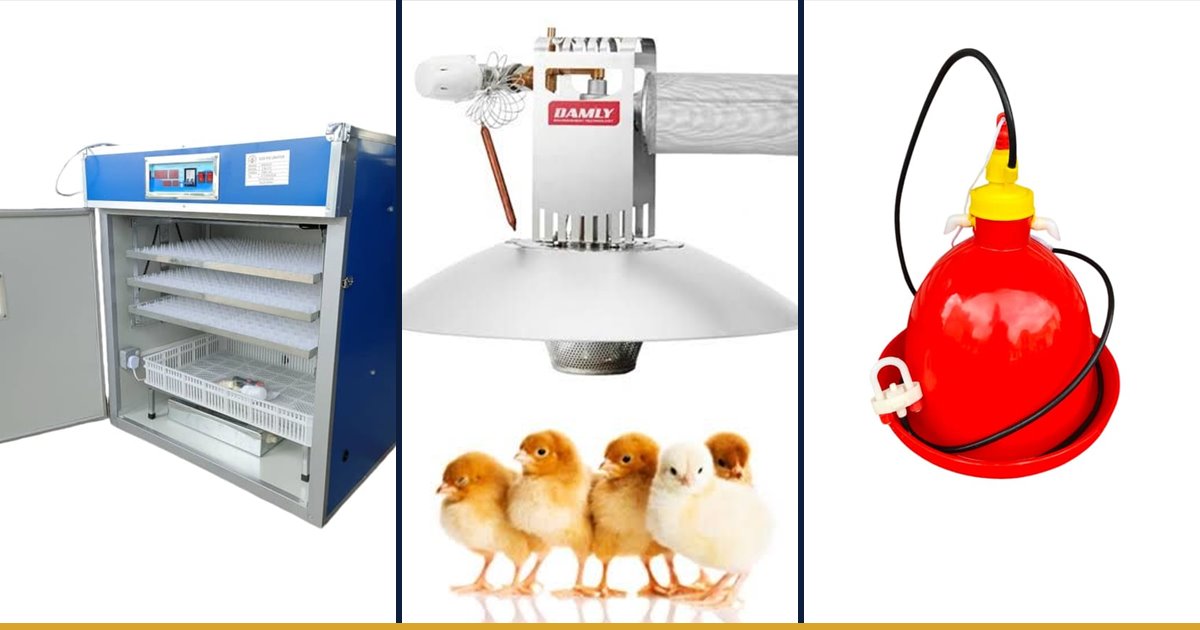
Not every poultry farm needs an incubator. If you are buying day-old chicks from a hatchery, you can skip this category entirely at the start. But if you keep breeding stock and want to produce your own chicks, or sell day-olds to other keepers, an incubator turns eggs into a second income stream.
The golden rule with incubators is to size to your realistic weekly output, not your dream flock, because a half-empty incubator wastes power and loses the even heat distribution that keeps hatch rates high. We walk through this in detail in our egg incubator buying guide, which covers matching capacity, power backup and budget to your operation. For most first-time hatchers, a smaller unit with automatic turning is the sensible entry point, and you add capacity once demand is proven.
Biosecurity and Health Tools: The Cheapest Insurance You Own
A single disease outbreak can erase a whole flock and months of income in under a week, which is why the humble biosecurity kit is the best-value equipment you will ever buy. The goal is simple: stop pathogens from entering, and stop them from spreading if they do.
Your starting kit should include a footbath or foot dip at the door filled with disinfectant, a knapsack sprayer for cleaning and disinfecting the house between cycles, and dedicated boots and an overall that stay at the farm. Add a basic first-aid and dosing set: a thermometer, syringes or an automatic vaccinator for routine vaccines such as Newcastle and Gumboro, and clean containers for measuring medication into drinking water. Keep a small quarantine space so any new or sick bird is separated from the main flock rather than mixing straight in.
The all-in, all-out rhythm protects the next flock. Between batches, clear the house completely, wash it, disinfect it with the sprayer, and rest it before the next chicks come in. This single habit breaks disease cycles that would otherwise carry from one flock to the next and quietly raise your mortality every round.
Egg Handling and Storage for Layers
If you are keeping layers, the equipment job does not end at the drinker. Comfortable, clean laying nests encourage hens to lay in the right place and keep eggs clean, which protects both their value and their food safety. Provide roughly one nest box for every four to five hens, line them with soft litter, and keep them shaded and quiet.
Once eggs are collected, handle and store them well. Plastic or moulded egg trays protect eggs from cracking and make counting and transport simple, and eggs held in a cool, shaded store keep their quality far longer than eggs left in the sun. If you sell hatching eggs, gentle handling and cool storage before they reach the incubator directly affect how many of them hatch. Small, cheap items here protect the value of the product you worked all cycle to produce.
Scaling From Chicks to Layers or Broilers
The smartest way to start is to buy equipment that grows with you rather than gear you outgrow in one season. Brooders, sprayers, tanks and nipple lines all scale gracefully: you add units and extend lines as bird numbers rise. Feeders and drinkers should be bought in a size and quantity matched to your current flock, with a small buffer, because you can always add more feeding and drinking spaces as the flock expands.
Broilers and layers pull your equipment in slightly different directions. Broilers grow fast and are gone in weeks, so you invest in feeder and drinker capacity and in fast turnaround cleaning between batches. Layers stay for a year or more, so you invest more in durable housing, nest boxes, egg handling and a drinking system that stays clean over the long haul. Whichever path you choose, start at a size you can manage well, prove the market, and scale in steps. A well-run flock of a hundred beats a poorly equipped flock of five hundred every time.
Key Takeaways
- Sort housing and ventilation first: dry, secure, and airy without floor-level draughts, at about one square metre per eight to ten mature layers.
- Brooding decides the flock. Have heat, water and feed ready and warm before the chicks arrive, and read the chicks to judge temperature.
- Provide roughly one feeding space per 20 to 25 birds, and fill feeders only a third full to cut wasted feed, your biggest running cost.
- Clean water drives growth. Plan about one drinker per 40 to 50 birds, upgrade to nipple lines as you scale, and keep water in reserve.
- Buy an incubator only if you hatch your own, and size it to realistic weekly output rather than your dream flock.
- A cheap biosecurity kit, footbath, sprayer, dedicated boots and vaccination gear, is the best insurance against a wipe-out.
- Start at a flock size you can manage well, then scale in steps with equipment that grows with you.
Frequently Asked Questions
What equipment do I absolutely need before my chicks arrive?
At minimum: a warm, secured brooding space with a working heat source, a brooder guard ring, chick feeder trays and clean chick drinkers, and litter on the floor. Everything must be set up and warm before the box is opened, not the same afternoon. Housing, biosecurity gear and larger feeders can be phased in as the birds grow.
How many feeders and drinkers do I need for my flock?
As a planning starting point, allow about one feeding space for every 20 to 25 birds and one drinker for roughly every 40 to 50 birds, adjusting as chicks grow into adult sizes. It is better to have slightly more feeding and drinking space than too little, since crowding stresses shy birds and holds back the whole flock. Tell us your numbers and we will help you size it.
Should I use a charcoal jiko or an electric brooder for heating?
Electric infrared bulbs and gas brooders give cleaner, more controllable heat and are safer to leave running. Charcoal jikos are cheaper but demand constant supervision and carry real fire and carbon monoxide risks. If your power supply is unreliable, a gas brooder or a solar-backed setup protects you from a cold night when the grid goes off, which is when broods are most often lost.
Do I need an incubator to start a poultry farm?
No. If you buy day-old chicks from a hatchery you can skip incubation entirely. An incubator only makes sense once you keep breeding stock and want to produce your own chicks or sell day-olds. When you do reach that stage, size the unit to your realistic weekly hatch, not to your maximum ambition.
Can Fuga help me plan a full poultry setup on a budget?
Yes. Tell us your target flock size, your bird type and your power and water situation, and our team will build a checklist that fits your budget and phase the purchases sensibly across all six branches. Reach us through the contact page or on WhatsApp for current pricing and honest advice with no upselling.