Every season, the farmers who harvest the most are rarely the ones with the biggest budgets. They are the ones who were ready when the first serious rains arrived. Land preparation is the quiet work that decides your yield long before a single seed goes in, and in Kenya the calendar gives you two clear windows to get it right.
The long rains run roughly from March to May, and the short rains from October to December. Both windows open fast and close faster. If your land is still bushy, compacted, or unploughed when the clouds gather, you lose the most valuable soil moisture of the whole season chasing preparation you should have finished weeks earlier.
This is a practical, stage-by-stage checklist of the tools and machines Kenyan farmers use to clear, plough, harrow, and prepare land for planting. Whether you work a half-acre by hand or several acres with a tractor, the sequence is the same, and getting the timing and the equipment right is what turns a hopeful season into a productive one.
Read the Season: Why Timing Beats Everything
The goal of pre-rain land preparation is simple. You want the soil open, weed-free, and ready to absorb the first heavy showers so that moisture soaks in rather than running off. Land prepared dry, ahead of the rains, holds water far better than land you scramble to clear once the ground is already wet and heavy.
For the long rains, that means starting your clearing and primary ploughing in January and February, while the ground is still workable and machinery can move without sinking. For the short rains, the same logic pushes your preparation into August and September, exactly where we are now.
Waiting for the first rain before you begin is the most common and most expensive mistake. Wet soil is harder to plough, compacts under wheels and hooves, and every day of delay is a day of lost planting window.
Stage 1: Clearing the Land
Before any ploughing, the land has to be cleared of last season's stalks, weeds, shrubs, and any regrowth. Clean ground lets your plough or tractor work evenly and stops old crop residue from harbouring pests and disease into the new season.
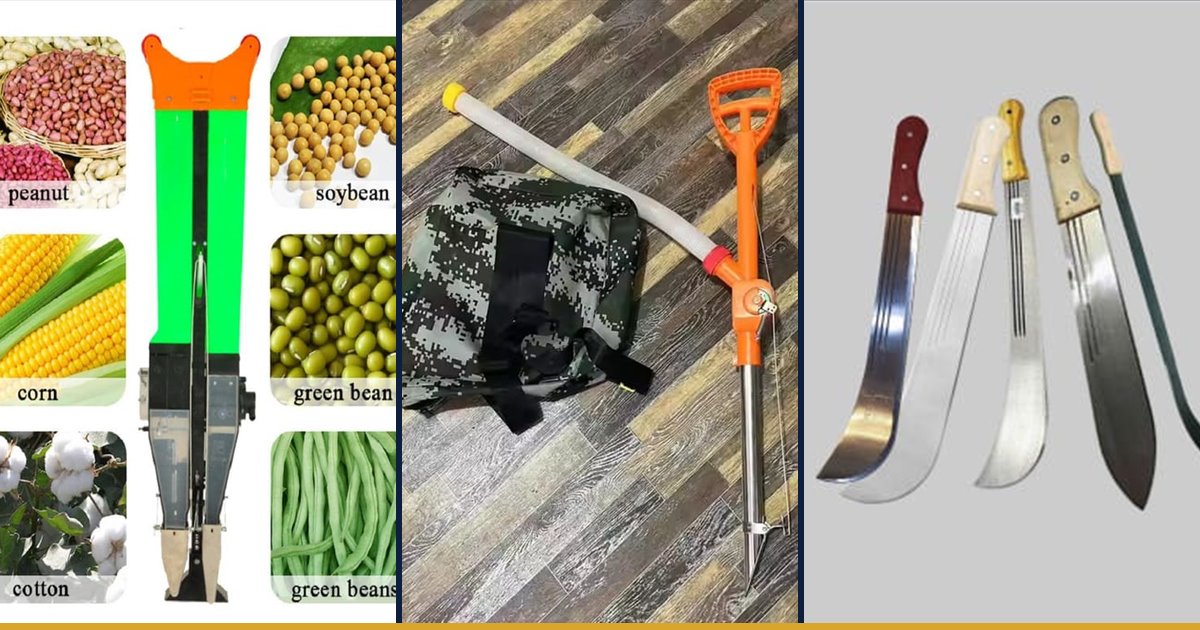
For most smallholders, clearing starts with the tools that have never let a Kenyan farmer down: a good panga, a slasher for standing grass and weeds, a jembe for uprooting stubborn roots, and a mattock or axe for woody bush. Quality matters here. A well-tempered blade holds its edge through an acre of clearing; a cheap one bends and blunts by mid-morning.
For larger plots or tougher regrowth, a petrol brush cutter clears grass and light bush many times faster than a slasher, and saves your back over a long day. If you are opening up land that has been fallow for a season or two, this is where a machine earns its keep quickly.
Stage 2: Primary Tillage, the Ploughing Stage
Ploughing is the heart of land preparation. It breaks and turns the topsoil, buries weeds, and opens the ground so air and the coming rain can penetrate. This is your primary tillage, the deep, first pass that sets up everything after it.
How you plough depends on your scale. For a small shamba, the jembe and hand hoe still do the job, though slowly. Many farmers across the Rift Valley and western Kenya rely on the ox-drawn mouldboard plough, a proven, low-cost option where you keep working animals.
For anyone working two acres or more, a tractor with a disc or mouldboard plough transforms the task from days of labour into hours. A disc plough handles hard, dry ground and root-filled soils well, which is exactly what you meet when preparing before the rains. If you do not own a tractor, hiring one for the ploughing pass is one of the smartest seasonal investments a growing farmer can make.
Aim to plough while the soil is still dry enough to crumble and turn cleanly. Ploughing soaked ground smears and compacts it, creating a hard layer under the surface that roots struggle to break through later.
Stage 3: Secondary Tillage, Harrowing and Levelling
Ploughing leaves the ground rough, in large clods. Harrowing is the second pass that breaks those clods down into a fine, even tilth, the crumbly soil texture that seeds germinate in best.
On mechanised farms, a disc harrow towed behind the tractor does this quickly and evenly. On smaller plots, the same result comes from working the ploughed ground over with a jembe and a rake, breaking clods and levelling as you go.
Levelling matters more than most farmers expect. An even seedbed means the rain spreads uniformly instead of pooling in low spots and washing seed off high ones. For row crops, a level, fine seedbed is what gives you that even, uniform germination that makes the rest of the season easier to manage.
Stage 4: Planting Preparation and Final Checks
With the seedbed fine and level, the last stage is getting ready to plant the moment the rains settle in. This is where preparation turns into action, and where having the right tools on hand keeps you from losing days.
For row crops such as maize and beans, mark your rows and spacing in advance. Smallholders plant by hand or with a simple hand planter, while larger farms use a tractor-mounted seed planter that places seed and fertiliser at the correct depth and spacing in one pass, saving enormous time when the planting window is tight.
Have your inputs staged and ready before the rain arrives: certified seed, basal fertiliser or well-rotted manure, and any soil amendment your ground needs. If you have had your soil tested, prepare to correct pH or nutrients now, while you can still work the amendment into the seedbed.
Match the Equipment to Your Scale
There is no single right toolkit. The smallholder with a sharp jembe, a slasher, and a panga can prepare a clean, well-tilled half-acre by hand and plant on time. The five-acre farmer needs a tractor and implements to hit the same window without exhausting the household.
The mistake to avoid is under-equipping for your land size. If you find yourself starting preparation late every season because the work is simply too much by hand, that is the clearest signal that hiring or investing in mechanised ploughing will pay for itself in recovered yield.
We stock hand tools, ploughs, and farm implements across our branches in Eldoret, Nakuru, Nairobi, and the Coast, and we can advise on machinery options for larger operations. Browse the full range of farm equipment to see what fits your plot and your budget.
Maintain Your Tools Before You Need Them
The busiest moment of the season is the worst time to discover a cracked plough disc or a blunt slasher. Before the preparation window opens, service what you own. Sharpen blades, check plough points and discs for wear, grease bearings, and start and test any engine-driven equipment.
A tool that fails mid-season costs you far more than its repair, it costs you days of your planting window. Sourcing a spare part or a replacement implement is quick when you plan ahead and slow when everyone else is scrambling at the same time.
If you keep a chaff cutter or other feed and farm machinery running alongside your cropping, the same discipline applies. Our guide on how to choose a chaff cutter walks through the same principle of matching a machine to your scale and keeping it serviced.
Key Takeaways
- Prepare land dry, ahead of the rains: aim for January and February before the long rains, and August and September before the short rains.
- Work the four stages in order: clear, plough, harrow, then prepare to plant.
- Clean clearing and deep primary ploughing set up everything that follows.
- Harrow to a fine, level tilth so rain soaks in evenly and germination is uniform.
- Match your tools to your land size, and stage your seed and fertiliser before the first showers.
- Service and sharpen every tool before the season starts, not during it.
Frequently Asked Questions
When should I start preparing my land in Kenya?
Start weeks before the rains, not after. For the long rains of March to May, begin clearing and ploughing in January and February. For the short rains of October to December, prepare in August and September. Dry land is easier to work and holds the first rain better.
Should I plough before or after the first rain?
Before, while the soil is still dry enough to crumble and turn cleanly. Ploughing wet, soaked ground smears and compacts it, forming a hard layer beneath the surface that roots struggle through later in the season.
Do I really need a tractor, or can I prepare land by hand?
It depends on your scale. A sharp jembe, slasher, and panga can prepare a clean half-acre or one-acre plot by hand. From about two acres upward, a tractor with a disc plough and harrow, whether owned or hired, lets you finish inside the planting window without exhausting the household.
What is the difference between ploughing and harrowing?
Ploughing is the first, deep pass that turns and breaks the topsoil and buries weeds. Harrowing is the second pass that breaks the resulting clods into a fine, level tilth, the crumbly seedbed texture that seeds germinate in best.
How much does farm equipment cost at Fuga?
Prices vary with the season and available stock, so we do not list fixed figures here. Confirm current price on WhatsApp at wa.me/254716961018 or call 0734263958, and our team will advise on the right tools for your plot and budget. You can also visit any branch in Eldoret, Nakuru, Nairobi, or the Coast.