
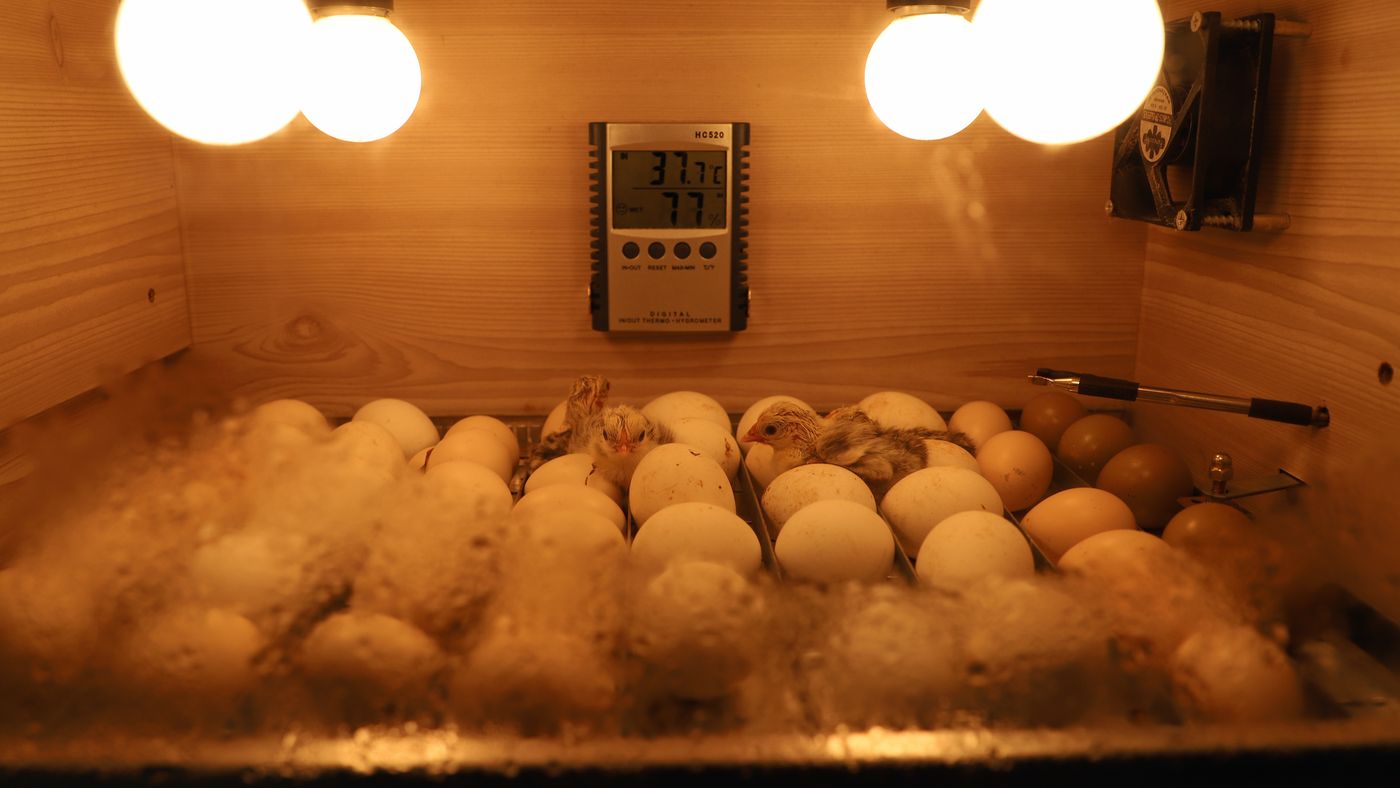
The machine hums, the display shows the numbers it has always shown, the eggs go in on schedule. Twenty-one days later, half the tray has not hatched. Nothing looks broken, so the owner blames the eggs, or the breed, or bad luck, and loads the next batch into the same quietly failing machine.
An incubator is not one appliance. It is a chain of parts: sensors that measure the air, a controller that makes decisions, and heaters, humidifiers, fans and turning motors that carry those decisions out. A sliding hatch rate almost always traces back to one weak link in that chain, and most links cost a fraction of a new machine to replace.
This guide explains how the chain works, how to catch the failures that never show on the display, and which spares belong on your shelf before hatch day. Fuga stocks the full ecosystem: XM-18C, XM-18D and XM-26 controllers, sensors, humidifiers, heaters, fans, turning motors, trays and candlers, alongside the incubators themselves.
The Control Chain: How an Incubator Actually Works
Every automatic incubator, from a 128-egg cabinet to a room-sized setter, runs the same loop. A thermo sensor and a hygro sensor sample the cabinet air. The controller compares those readings to its programmed targets. When temperature falls below target it switches the heater on; when humidity falls it drives the humidifier; on a timer, it powers the egg-turning motor. A DC fan runs almost continuously, stirring the air so the sensor reads something close to what the eggs actually feel.
The controllers Fuga supplies most often are the XM series. The XM-18C and XM-18D manage temperature, humidity and turning together, the 18D adding refinements to humidity control and display; the XM-26 serves smaller machines. All are replaceable modules: if a board fails, the cabinet, heater and trays are still good, and swapping the controller revives the machine.
The chain framing tells you where to look when hatches slip. The controller is only as honest as its sensors, the heater only as effective as the fan spreading its warmth, and no temperature control will save eggs a dead motor never turned.
Sensor Drift: The Failure You Cannot See on the Display
Heaters and fans fail loudly: the cabinet goes cold, the air goes still, and you notice. Sensors fail silently. A temperature or humidity sensor that drifts still produces a number, and the controller still dutifully holds the cabinet at that number. The display looks perfect while the actual air around the eggs sits a degree or more away from where it should be, batch after batch.
Embryos forgive temperature error less than almost anything else, and drift of even a fraction of a degree, sustained across the whole incubation, shifts hatch timing and weakens chicks. Watch for hatches arriving consistently early or late, chicks pipping but dying in the shell, or a hatch rate declining over months on a machine that used to perform.
When you confirm drift, replace the sensor rather than nursing it. On XM-series controllers the sensor is a plug-in probe, so the swap takes minutes. Recalibrate or offset only if your controller manual describes the procedure; guessing at offsets adds a second error on top of the first.
Humidity: Why It Matters at Set and at Hatch
An egg breathes through thousands of microscopic pores in its shell, losing water as vapour throughout incubation. That loss is not a defect, it is the mechanism: the egg must lose enough water to grow the air cell the chick will breathe from when it internally pips. Cabinet humidity is the tap that controls the rate of that loss. Too dry and the embryo dehydrates; too wet and the air cell stays too small and chicks can drown in residual fluid at hatch.
The needs change at the end. During hatching, higher humidity keeps the inner shell membrane soft so the chick can turn and cut its way out. A membrane dried out by a hatch-day humidity failure becomes tough and leathery, and you get the most heartbreaking loss in poultry: fully formed chicks, pipped and dead in the shell.
We are deliberately not printing target percentages here. Correct settings differ between chicken, duck, quail and guinea fowl eggs, between machine designs and between climates; your incubator manual, refined by your own candling records, outranks any number on the internet. What is universal is the machinery that delivers humidity, and that machinery wears.
Fuga supplies both common humidifier types. Atomiser (mist) humidifiers spin or vibrate water into fine mist; they respond fast but their discs and nozzles scale up quickly in hard water. Roller and evaporative types lift water on a rotating drum or pad for the airflow to evaporate; slower, but tolerant. Whichever you run, use clean water, descale on a schedule, and treat a humidity reading that refuses to rise as a mechanical symptom: empty reservoir, scaled atomiser disc, stalled roller motor, or a failed hygro sensor lying about the room.
Egg Turning: Motors, Limit Switches and What Failure Looks Like
A hen shuffles her eggs many times a day, and the machine must copy her. Turning stops the embryo sticking to the shell membrane and helps the yolk and developing vessels position correctly. In most cabinet incubators a geared turning motor tilts the whole setter tray slowly from one side to the other on a timed cycle.
The limit switch is the small lever or micro-switch at each end of the tilt travel. When the tray reaches full tilt it presses the switch, which tells the controller to cut the motor. When a limit switch fails, one of two things happens: the tray stops dead at one extreme and never returns, or the motor keeps pushing past the end of travel, grinding, clicking or straining against the frame until the gearbox strips. Both are cheap fixes caught early and expensive ones caught late.
The check costs nothing: once a day, glance at the tray angle. If it leans the same way every time you look, turning has stopped, and eggs that sit still for days die in place while the display shows a perfect 37-point-something. Turning failure is invisible on the screen, which is why it makes the daily checklist.
Power Cuts: AC/DC Controllers and Battery Backup
A power cut is the one failure every Kenyan incubator owner will meet. Eggs tolerate a short cool-down far better than people fear, especially early in incubation, but repeated long outages in the final week are hatch killers. The engineering answer is to plan for the outage instead of hoping.
AC/DC controllers and incubators, such as the 210-egg AC/DC machine Fuga stocks, run on mains and switch automatically to a 12 V battery when the mains fails. Pair one with a charged car or solar battery and an outage becomes a non-event: heater, fan and turner carry on. If your machine is AC-only, your fallbacks are an inverter and battery sized for the heater load, or the old hatchery discipline: keep the cabinet shut, insulate it with blankets, and let its thermal mass ride out short cuts. Opening the door to check "how bad it is" dumps the heat you were trying to keep.
Candling: The Feedback That Closes the Loop
Instruments tell you what the air is doing; candling tells you what the eggs think of it. A candler box is nothing more than a bright, cool lamp in a dark room, and shining it through an egg shows the story inside: spreading blood vessels in a live embryo, a clear egg that was never fertile, or the blood ring of early death.
For the spares conversation, the air cell is the prize. Its size at each candling records how much water the egg has lost, which makes candling your humidity audit. Air cells consistently too small across the tray say the cabinet is running wet; too large says too dry. That feedback catches a scaled humidifier or drifting hygro sensor mid-batch, while there is still time to fix it. Candle in a warm room, work quickly, log what you see; two or three candlings per batch is plenty. If you are new to reading eggs, our egg incubator buying guide covers the basics alongside machine selection.
The Spares Shelf: What to Stock Before Hatch Day
A batch of eggs is a 21-day deadline that does not pause while you hunt for parts. The economics are lopsided: every spare in the incubator ecosystem costs a small fraction of the birds a failed hatch destroys. Stock by two rules: how likely the part is to fail, and how fast the eggs die when it does.
For a serious operation, the shelf list is: a spare controller matching your machine (XM-18C, 18D or 26), one thermo and one hygro sensor probe, a humidifier atomiser disc or roller, a heater element, a DC fan, a turning motor, a pair of limit switches, fuses, and spare setter and hatching trays, since cracked trays cost eggs at every transfer. Add a candler box and an independent thermo-hygrometer as audit tools. Everything on that list is in our incubator spare parts range.
Match the Machine to the Plan, Then Protect It
If you are still choosing a machine, buy with the spares ecosystem in mind: an incubator with a common controller family and locally stocked parts will out-earn a cheaper orphan model within a year. Fuga's range runs from 64-egg starter units through the Subhen automatic series to multi-thousand-egg cabinets, with current pricing on the price list. And the chicks you hatch need somewhere warm to go next: our chick brooding guide picks up at day one, from brooder rings to feeders.
Key Takeaways
- An incubator is a chain: sensors inform the controller, which drives the heater, humidifier, fan and turner. Hatch problems trace to links, not to the whole machine.
- Sensors fail silently. Audit the controller against an independent thermo-hygrometer at egg height; a gap that grows over weeks means the sensor must be replaced.
- Humidity controls the egg's water loss and air cell growth, and hatch-time humidity keeps the shell membrane soft. Follow your incubator manual's settings for your species, not internet universals.
- Check the tray angle daily; a tray stuck at one tilt means a failed turning motor or limit switch, invisible on the display.
- AC/DC controllers with a 12 V battery turn power cuts into non-events; AC-only machines need an inverter plan or strict door discipline during outages.
- Candling is your feedback loop: air cell size across the tray is a live audit of your humidity system.
- Stock spares before hatch day: controller, sensors, humidifier head, heater, fan, turning motor, limit switches, fuses and trays.
- Repair beats replacement while the cabinet is sound; every working part of an incubator is a bolt-on module.
Frequently Asked Questions
Why did my hatch rate drop when the incubator display looks normal?
The commonest cause is a drifted sensor: the controller holds the number the sensor reports, not the true cabinet condition. Verify with a separate thermo-hygrometer at egg height, and confirm the eggs are actually turning by checking the tray angle at different times of day. Both failures are invisible on the display.
What humidity should I set my incubator to?
There is no single correct figure: chicken, duck and quail eggs differ, and so do machine designs and local climates. Start from your incubator manual's recommendation for your species, then refine using candling: air cells growing too slowly mean the cabinet is running too wet, too fast means too dry.
What is the difference between XM-18C, XM-18D and XM-26 controllers?
All are automatic incubation controllers managing temperature, humidity and egg turning. The XM-18C is the widely used standard, the XM-18D its refined sibling with improved humidity handling, and the XM-26 suits smaller machines. Send our team a photo of your current board on WhatsApp and we will confirm the right replacement for your wiring and sensors.
Will a power cut kill the eggs in my incubator?
A short outage rarely does, especially early in incubation: keep the door shut, insulate the cabinet, and its stored heat covers brief cuts. Long or repeated outages in the final week are dangerous. An AC/DC incubator or controller with a charged 12 V battery switches over automatically and is the most reliable protection.
How much do incubator spares cost at Fuga?
Prices vary by part and move with stock, so confirm current figures on WhatsApp at wa.me/254716961018 or call 0734263958. Tell us your incubator model or send a photo of the part, and we will match the correct controller, sensor, motor or tray, with stock at our branches or delivery countrywide.