A poultry farmer in Nakuru does everything the advice says. He grinds his own maize, buys sunflower cake and omena, adds a layer premix from an agrovet, tips the lot into an old drum, rolls it across the yard a few times and bags it. The formulation came from a nutritionist and is sound. The cost per kilogram is well below the compounded feed he used to buy.
Six weeks later production has slipped and shells are thinner. Two birds in the same house look like they are on different diets, because in every way that matters they are. Nobody can point at the cause, so the blame lands on the premix, then on the omena, then on the weather.
Nothing was wrong with the formula. The formula only ever existed on paper. What the birds actually ate was a different ration in every scoop, because the drum never turned the ingredients into a single material. This article covers the machine and the method that close that gap: which mixer suits your batch, how long to run it, what order to load it, how to handle micro-ingredients, and how to prove your mix is uniform.
What "Uniform" Actually Means, and Why the Animal Notices First
A ration is a promise about the composition of every mouthful. Mixing is the process of making that promise true at the scale of a scoop rather than the scale of a tonne.
The feed industry measures that with the coefficient of variation, or CV. You take small samples from different points in a finished batch, measure the concentration of one chosen ingredient in each, then divide the standard deviation of those results by their average. A low CV means every sample looked like every other. A high CV means your batch is not one feed, it is several. The common working target is a CV under 10 percent for a complete feed, tighter where medication or a critical micro-ingredient is involved.
Ingredients differ in particle size, shape, density and stickiness, so maize germ meal, wheat pollard, limestone flour, salt and a vitamin premix behave like five different powders in the same drum. Left alone, small dense particles migrate down through the gaps between large light ones. That is segregation, and it happens during mixing, during discharge, during bagging and again inside the feeder.
So a poorly mixed layer ration does not produce an average result. It produces a bird that ate too much limestone and not enough methionine, standing next to a bird that ate the opposite. Averages hide this, which is why farmers so often conclude that home mixing "does not work as well" as bought feed. It works exactly as well, provided the mixing is real.
The formula is a claim, the mixer is the proof. A nutritionist can only specify what should be in each kilogram. Whether it is actually there is decided by your machine, your loading order and your timer. No formulation survives a bad mix.
Vertical or Horizontal: Two Machines With Two Different Jobs
Almost every on-farm mixer sold in Kenya is one of two designs, and they are not interchangeable.
A vertical mixer is a tall cone or cylinder with a screw auger up the centre. The auger lifts material from the bottom to the top, where it spills outward and falls back down the walls under gravity. It is a convection mixer: it moves whole streams around a loop and relies on repeated passes to fold them together. It is simple, cheap, draws modest power and uses very little floor space.
A horizontal mixer is a U-shaped trough with a shaft carrying ribbons or paddles. Ribbons are helical bands, an outer one pushing material one way and an inner one pushing it back, so the whole charge is in continuous counter-flow. It is far more aggressive, it works the entire batch at once, and it usually reaches an acceptable CV in a fraction of the time a vertical unit needs.
Two practical differences decide most purchases. The first is liquids: pour molasses or oil into a screw mixer and it forms balls that never break up, because gravity fall has no shear, while a ribbon mixer with a spray bar distributes them properly. The second is discharge. A horizontal mixer drops the whole batch through a full length gate in seconds, so nothing re-segregates. A vertical mixer empties more slowly and retains a residue in the cone, which is tomorrow's contamination.
None of this makes the vertical mixer a bad machine. For a few hundred kilograms of dry meal a day with no liquids in the formula, it is often the sensible buy. The mistake is buying one and then running a ration containing oil, molasses or a medicated premix, because those are exactly the jobs it does badly.
Fill Level and Mixing Time: Two Settings That Decide the Batch
A mixer has a rated capacity, and almost nobody uses it correctly. Both overfilling and underfilling destroy uniformity, for opposite reasons.
Overfilling removes the space the material needs to move. A vertical mixer must have room above the charge for material to spill off the auger and travel back down the wall. Fill it to the rim and the auger churns a column in the middle while the outer material sits still. A horizontal mixer needs headroom above the ribbons: bury them and you get a slow shuffle instead of a mix.
Underfilling is less obvious and just as damaging. If the charge does not reach the top of the outer ribbon, only the lower trough is worked and the counter-flow that does the mixing never forms. Farmers who try a half-sack trial in a one-tonne machine usually conclude, wrongly, that the mixer is faulty. Find the manufacturer's stated working range, mark that fill level inside the machine with a weld bead or painted line, and size batches so you always mix near it.
Mark the fill line, then never argue with it. A painted line inside the mixer is worth more than any instruction manual, because it survives staff changes. Every mix either reaches the line or it is not a mix, it is a batch of loosely associated ingredients.
The second setting is time, and most operators believe it works like boiling: longer is safer. It does not. Uniformity climbs steeply, flattens at a peak, and then declines.
The decline is the part nobody expects. Once the batch is thoroughly mixed, continued agitation stops improving anything and starts sorting the material instead. Fine dense particles such as limestone flour and salt work their way down through the coarser, lighter cereal fraction, and the mixer becomes a very slow separator. This is over-mixing, and it is a real and repeatable effect, not a myth.
So every mixer, running a given formula at a given fill level, has a best mixing time specific to that combination. A vertical mixer reaches its peak later because its action is gentler. A formula with widely different particle sizes reaches a lower peak and falls off it faster.
Finding the peak costs one morning. Mix a normal batch, stopping to pull samples at two, four, six, eight, ten and fourteen minutes using the method described later. Pick the shortest time that gives a consistently good spread, add a small margin, and fit a timer so nobody has to remember it.
Order of Loading: Build the Mix Rather Than Dumping It
The sequence in which ingredients enter the mixer does real work, and it costs nothing to adopt.
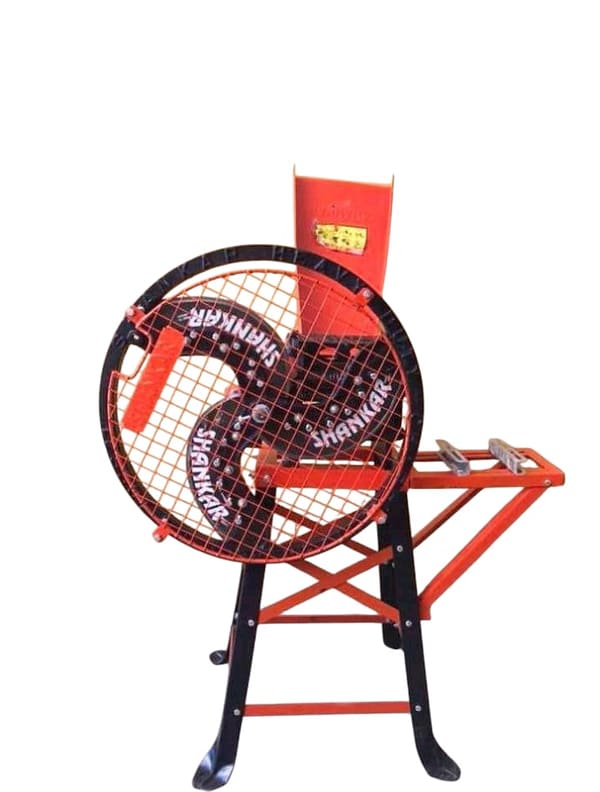
Start with particle size, before the mixer is even involved. Grind the cereal fraction to one consistent size, because a mix of coarse cracked grain and fine flour will segregate no matter how well you mix it. Consistency of grind matters more than fineness: a hammer mill with a worn or wrong screen produces a wide spread of sizes and guarantees separation downstream. The same principle applies at the forage end, which is why an evenly set chaff cutter improves the consistency of a total mixed ration exactly as a good hammer mill screen improves a poultry meal.
Then load in layers. Put roughly two thirds of the ground bulk carrier in first so the micro-ingredients land on a bed rather than on bare steel, where they cake into corners. Spread the pre-blended premix and any minerals across that surface rather than dropping them in one heap, then cap with the remaining bulk so the small additions sit in the middle of the charge where the action is strongest.
Liquids go last and go slowly, entering over the running mixer through a spray bar rather than a bucket, and only once the dry mix has come together. A litre of molasses poured onto a stationary charge makes a lump that will still be a lump at discharge.
Finally, discharge the whole batch rather than part-emptying the mixer and topping it up for the next run. A mixed batch sitting still is quietly separating again, and a part-emptied mixer starts the next batch contaminated and at the wrong fill level.
Premix and Micro-Ingredients: Step Dilution Is Not Optional
This is the part of home mixing that carries the most risk and gets the least attention.
A micro-ingredient is anything included at a very small rate: vitamin and trace mineral premixes, synthetic amino acids, salt, toxin binders, enzymes and prescribed medication. The whole argument for them depends on being spread evenly through a mass hundreds or thousands of times their own weight, and a handful of powder tipped into a drum of maize will not do that.
The technique that solves it is step dilution, or pre-blending. Rather than adding the micro-ingredient straight to the batch, first mix it into a small quantity of carrier, usually some of the same ground cereal, then mix that blend into a larger quantity, and only then into the full batch. The mixer is never asked to disperse a teaspoon into a tonne in one move.
On a farm that means owning a second, much smaller mixing vessel used only for pre-blends, and weighing micro-ingredients on a scale that can actually resolve them. A platform scale meant for sacks cannot weigh a few hundred grams accurately, and a wrong reading there is multiplied across the whole batch. Buy premix from a supplier who states the inclusion rate in writing, keep it sealed, dry and out of sunlight because vitamins degrade, and never raise the rate to "make it stronger": trace minerals and some vitamins are harmful in excess.
Get the formulation from someone qualified. This article is about the equipment and the method, not the recipe. Ration formulations should come from a qualified animal nutritionist or from the premix supplier's own technical sheet, matched to your species, age group, production stage and the actual ingredients you can buy locally.
How to Test a Mix Without a Laboratory
A proper CV test needs a laboratory. What you can do on a farm is a tracer test, which is crude but far better than nothing and catches every serious mixing fault.
Add a measured amount of a distinctly coloured, similarly sized material at the start of the mix. After the timed cycle, take ten small samples of roughly equal size from different points during discharge, spread each on a white surface and count the tracer particles. If the counts are close, the mix is working. If one sample holds double the tracer of another, no amount of arguing about the formula will help.
Sampling method matters as much as the tracer. Sample during discharge rather than by digging into a resting batch, because digging disturbs exactly the layers you are assessing. Spread the samples across the whole discharge, from the first bag to the last, since segregation shows itself as a difference between the start and the end of a run. Use the same scoop every time.
There is also a five-second visual check worth doing on every batch. Look at the last material leaving the mixer: streaks of colour, a band of different texture, lumps of caked premix or a dusty tail are direct evidence that the batch is not uniform. When a test fails, work through the causes in order: fill level, mixing time, loading order, particle sizes too different, worn ribbons or auger flights with excessive clearance from the shell, and caked material narrowing the trough. Worn clearance is the quiet one, because the gap grows slowly and uniformity falls away over months without a single obviously bad day.
Grinding, Mixing and Pelleting: One Line With Three Jobs
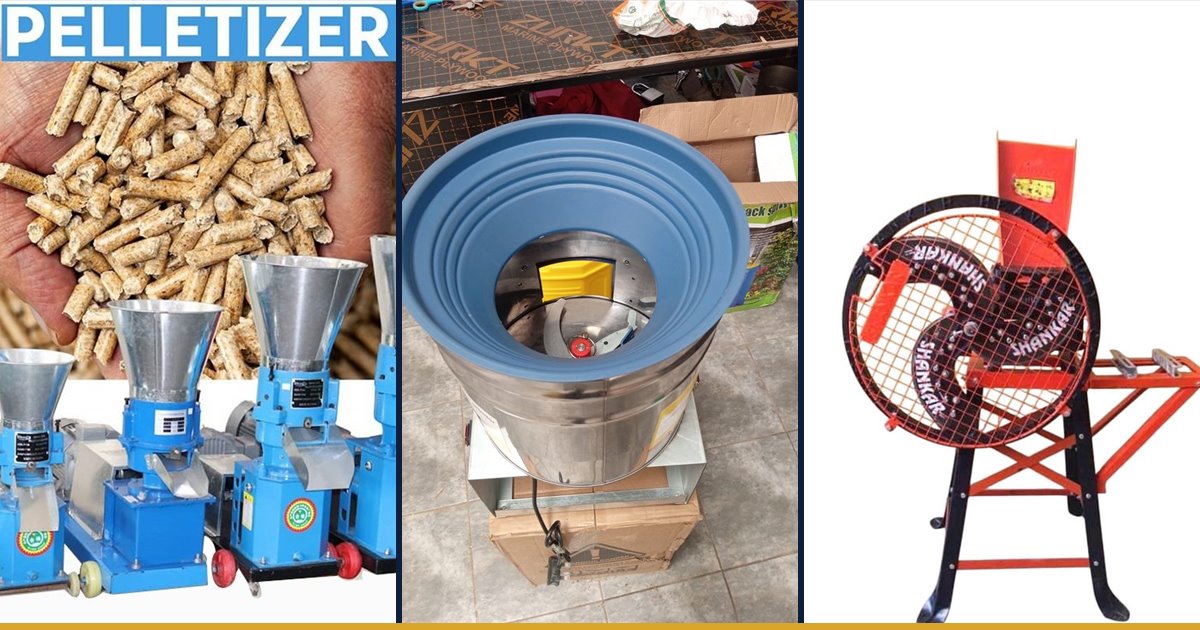
Mixing rarely stands alone. On most farms it sits between a hammer mill and a pelletizer, and the three machines constrain each other. The hammer mill sets particle size, the mixer makes the material homogeneous, and the pelletizer locks that homogeneity in place. That last step is the most under-appreciated benefit of pelleting.
Here is the mechanism. In a meal, an animal can select. Birds are very good at picking out the large, palatable particles and leaving the fine mineral and premix fraction behind, precisely the fraction carrying the vitamins, amino acids and calcium. Even a perfectly mixed meal can be un-mixed by the birds themselves. A pellet removes the choice: every pellet is a fixed sample of the whole ration.
That explains a common result: a farmer improves his mixing, sees no change and gives up. If the feed is still a dusty meal in an overfilled feeder, the gain is thrown away downstream. Our guide on reducing poultry feed wastage covers the feeder side of the same problem.
The relationship runs the other way too. Pellet quality depends on how the material binds as it passes through the die, and a batch with wet patches of molasses in one part and dry meal in another produces inconsistent pellets, a fluctuating load on the motor and a die that wears unevenly. If you are weighing up whether pelleting earns its keep at your scale, our article on whether a feed pelletizer is worth it works through throughput and payback, and the pellet machine range shows the capacities commonly used on Kenyan farms.
Cleanout, Carryover and the Records That Protect You
Every mixer retains some material after discharge. That residue is called carryover, and it becomes a problem the moment two rations share a machine. Mix a medicated ration and then a layer ration without a cleanout and residues go into eggs or milk intended for sale, which is a food safety and legal problem rather than a nutritional one. The less obvious case is a copper-rich pig or broiler premix carried into a ration for a species that tolerates copper poorly.
Two defences work. The first is sequencing: run rations in an order that makes carryover harmless, generally from the most sensitive to the least, and never straight from a medicated batch to a food-producing one. The second is flushing: run a batch of plain ground cereal through between runs and use it in the least sensitive ration you make. Add a physical cleanout, machine locked off at the isolator, on a written schedule.
Records turn this from a good intention into a system. For each batch write down the date, the ration, the batch weight, the ingredients and their source, the premix batch number, the mixing time and who ran it. When a flock does something unexpected six weeks later, that book is the only thing that will tell you whether the feed changed.
One last word on the buying decision. Size the mixer to the batch you will genuinely run every week, not the one you hope to run next year, and budget for the pre-blending vessel and an accurate scale at the same time. Current prices for feed processing machines are on our price list, kept up to date on the site rather than quoted from memory.
Key Takeaways
- A ration exists in the scoop, not on the paper. Mixing uniformity, measured as a coefficient of variation, is what turns a formulation into feed.
- Vertical screw mixers are cheap, compact and adequate for dry meal. Horizontal ribbon mixers mix faster, handle oils and molasses properly and discharge cleanly, so they suit liquids or medication.
- Fill level is part of the machine. Overfilling and underfilling both wreck a mix, so mark the working fill line inside the mixer and always mix to it.
- Mixing time has a peak and then reverses. Find the best time by testing, fit a timer, and stop treating longer as safer.
- Micro-ingredients must be step diluted through a pre-blend, weighed on a scale that can resolve them, and never dosed above the supplier's stated rate.
- Test with a tracer and ten samples taken during discharge, not by digging into a resting batch, and keep a batch record so a later problem can be traced.
Frequently Asked Questions
Can I mix feed in a drum or on a concrete floor with a shovel?
You can, and for small quantities of a simple dry mix with no premix it may be tolerable. It will not reliably disperse a vitamin or mineral premix, and it will not handle oil or molasses at all. Shovel mixing on a floor also re-segregates as soon as you scoop the pile into bags. If your ration contains any micro-ingredient, a proper mixer with a pre-blend step is a requirement rather than an upgrade.
How long should I run my feed mixer?
Long enough to reach the peak of its uniformity curve at your normal fill level with your normal formula, and no longer. That time is specific to your machine, so it has to be found by pulling samples at several intervals and comparing them. Horizontal ribbon mixers reach their peak considerably sooner than vertical screw mixers. Once you have the number, fit a timer so it is a setting rather than a judgement call.
What size of feed mixer should I buy?
Size it to the batch you will actually run each week, because a mixer run well below its working fill range mixes poorly. Work backwards from your daily consumption, decide how many batches a week you want to make, and pick a capacity that lets you mix near the stated fill level every time. Buying large to "grow into it" usually means half empty batches that never mix properly.
Where do I get the actual ration formulation?
From a qualified animal nutritionist, your vet, or the technical sheet supplied with your premix. Formulations have to match the species, the age and production stage, and the real nutrient content of the ingredients you can buy locally. Copying a percentage list from the internet or from a neighbour is the most common reason a home-mixed ration under-performs even when the mixing is good.
At Fuga we supply the machines on either side of this question: hammer mills and chaff cutters that set particle size, mixers that do the work, and pellet machines that lock the result in place. Tell us your species, your daily feed volume and whether your ration includes molasses, and we will tell you honestly which machine fits and which you do not need yet.